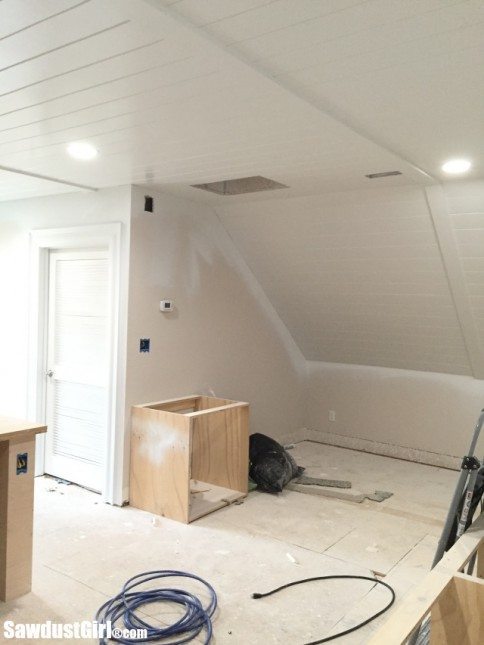
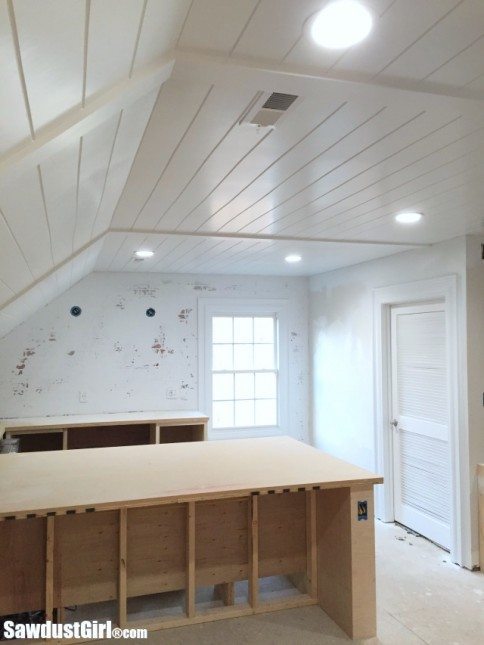
I finished my plywood plank ceiling and I LOVE it! I wanted to cover my studio ceilings with pine tongue and groove planks like I’ve done in most of the main level of my house. I’m able to get Pine tongue and groove planks for about $2.25/sq ft so it was going to cost about $3000 to do my studio ceiling. I didn’t want to spend $3000 on my studio ceiling. I figured if I was willing to put in a little more work I could create the look I wanted for much less. And I did. I spent 37¢/sq ft on my ceilings for a grand total of less than $400. Boom! This post is sponsored by Zircon Corporation
V Groove Plywood Plank Ceiling
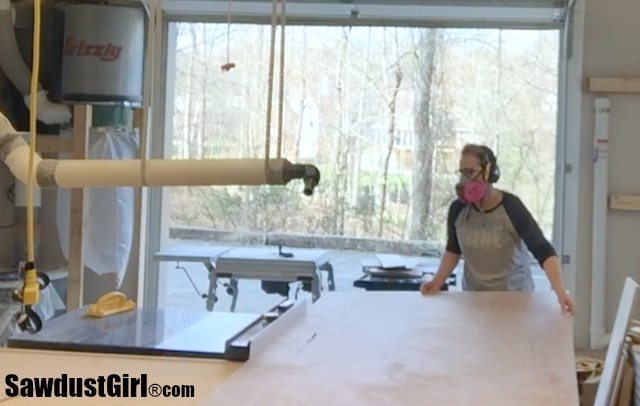
I purchased 4×8 sheets of 1/4″ plywood underlayment and ripped them down. Right now (in my region) 1/4″ cabinet grade plywood is $29 per sheet but 1/4″ plywood underlayment is only $11/sheet. I’ve purchased the underlayment many times for cabinet backs. One side is very smooth and it’s actually quite pretty. If I didn’t paint everything I’m sure I would have pointed it out before now. 😉
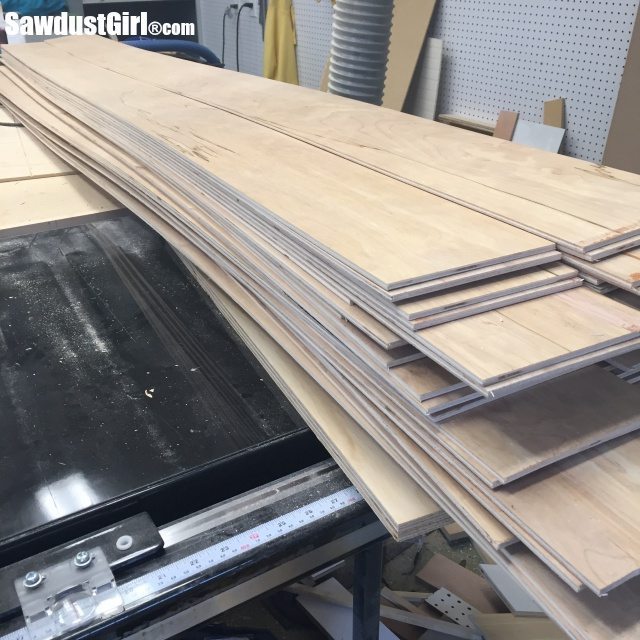
I ripped the sheets down to just under 6″ wide strips. Each 4×8 sheet produced 8 planks.
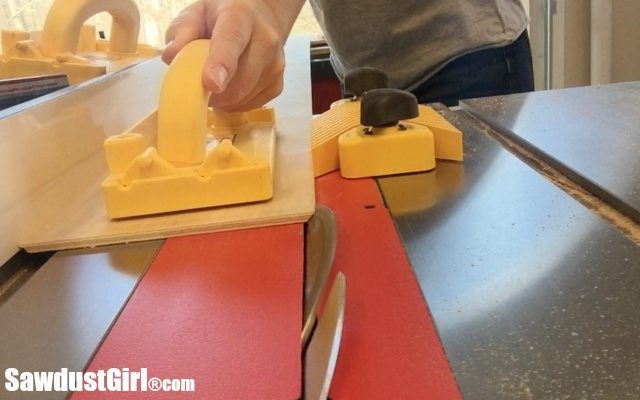
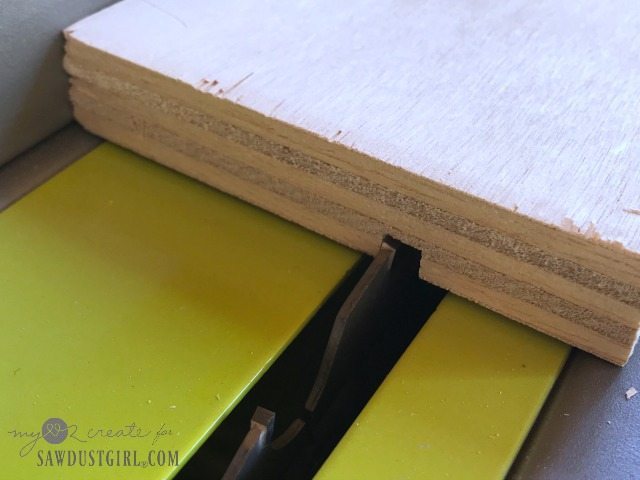
After cutting all my strips, I set my blade to 45º and ran each strip through again…and again, beveling each side of each plank. The important thing I had to remember was to always have the “good side” facing down while beveling the sides. I’m using a MicroJig GRR-Ripper to push the planks through the saw and keep my hands safely away from the blade.
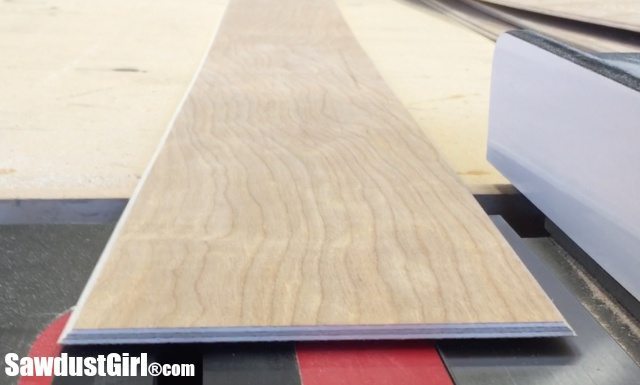
After beveling, (and flipping it over, right side up) this is what a single plank looks like. It took me about 15 minutes to rip down each 4×8 sheet and bevel the sides creating 8 planks.

I’m installing my plywood plank ceiling perpendicular to the ceiling joists so I needed to find those. To find studs or joists, there’s always the ole’ “knock and listen” or resort to the “drill a bunch of holes until you hit something” method.
I prefer a good stud finder and my Zircon stud finder is the best I’ve ever used so I’m super happy to have Zircon sponsoring this post! The stud finder shows you the exact center of the studs as you pull it across the wall.

This one is extra cool. As you pull it across the wall, it shows you the location of each edge as well as the center so there is no confusion of where you need to nail or screw to hit the wood behind the sheetrock.
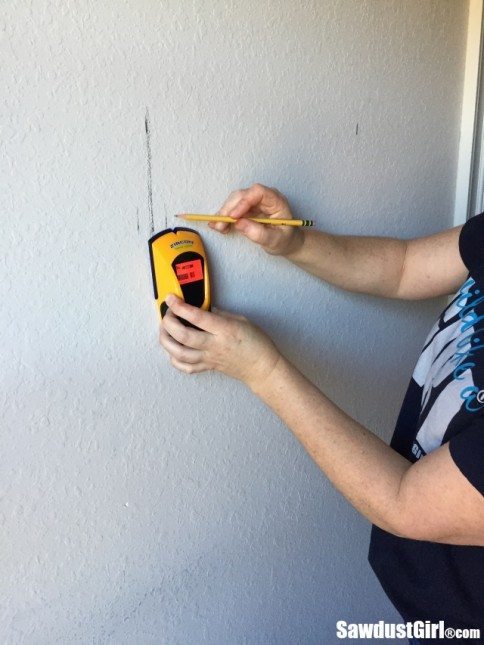
Pencils break constantly when trying to mark on this bumpy texture so I used a soft tip a marker to mark the location of my ceiling joists.
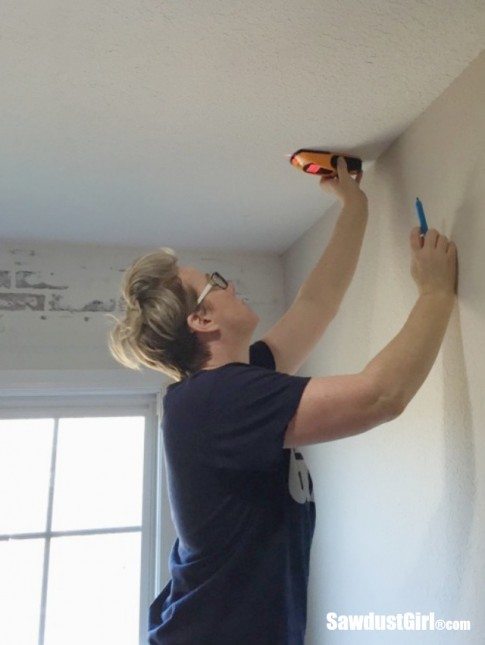
Since my studio has three different sections of ceilings I had to do a whole lot of stud finding. I marked the stud location on both sides of the flat portion of the ceiling and at the top and bottom of the slanted ceiling sections.
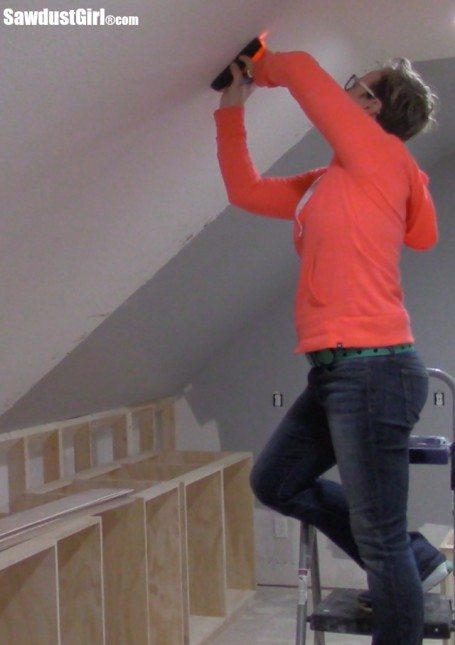
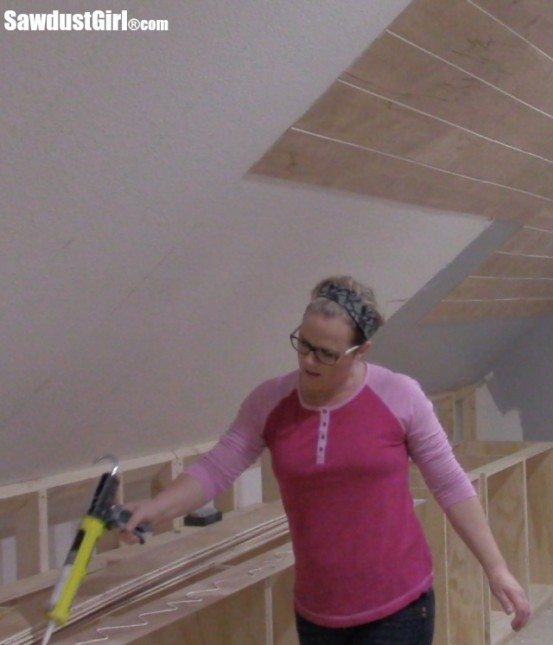
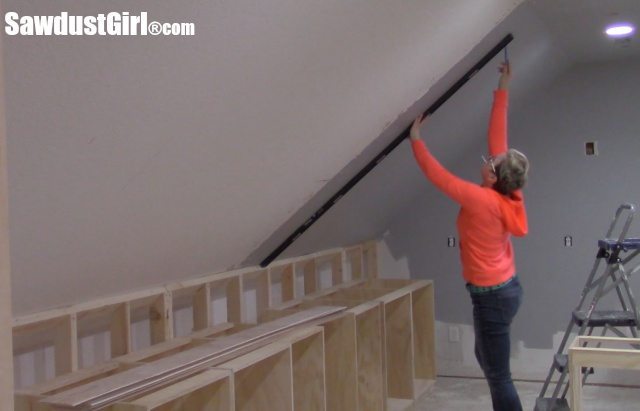
I’m too impatient to wait for help unless I absolutely need it so I used a level as a straight edge to draw a line from top to bottom marks on the slanted ceiling. I then proceeded to install the plywood plank ceiling all by myself because I really wanted to get started and SEE what this ceiling would look like. It was all just an idea in my brain and I wanted my eyeballs to get involved so I could decide if it really was going to look like…what I wanted it to look like.
I’ used construction adhesive and nails to attach the planks. I shoot nails only into the joists which is why I needed to mark the location. I spent almost 3 hours on a very small section before deciding I needed assistance. The planks are 8′ long and it’s difficult to manage on your own.
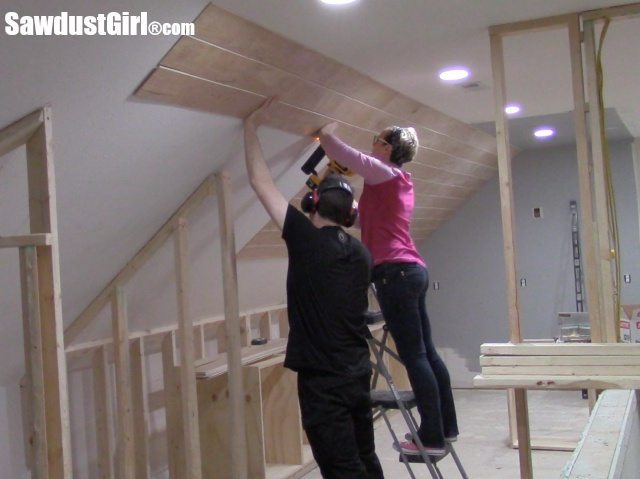
When Wes got home from work it only took us 1/2 hour to install over twice as much as I had done on my own. This is definitely a two person job.
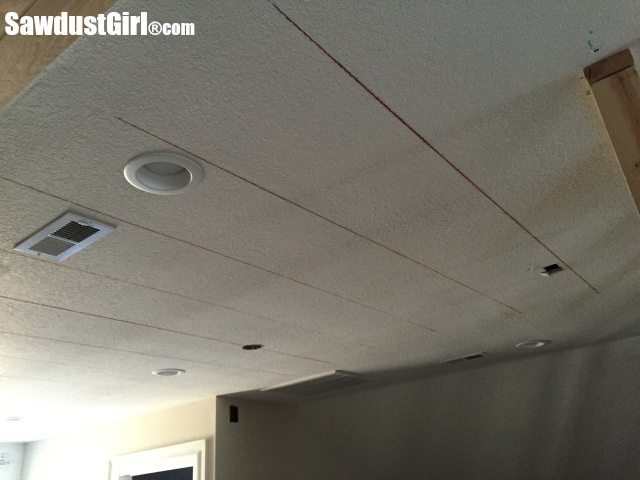
I had Penny help me finish the remainder of the ceiling. With two people, snapping a chalk line is the easiest way to mark the location of the ceiling joists across the entire ceiling.
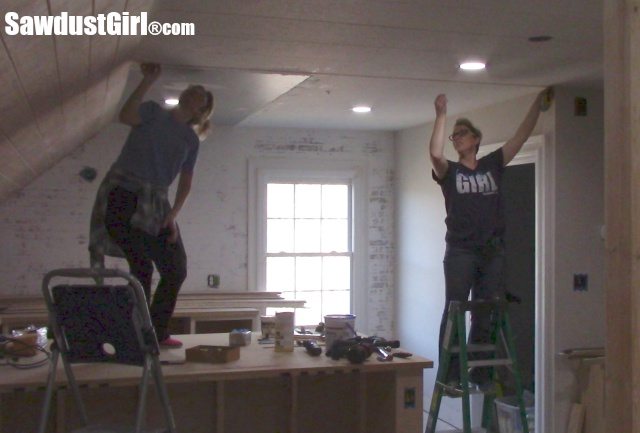
These lines let us know where to shoot our nails in each plank.
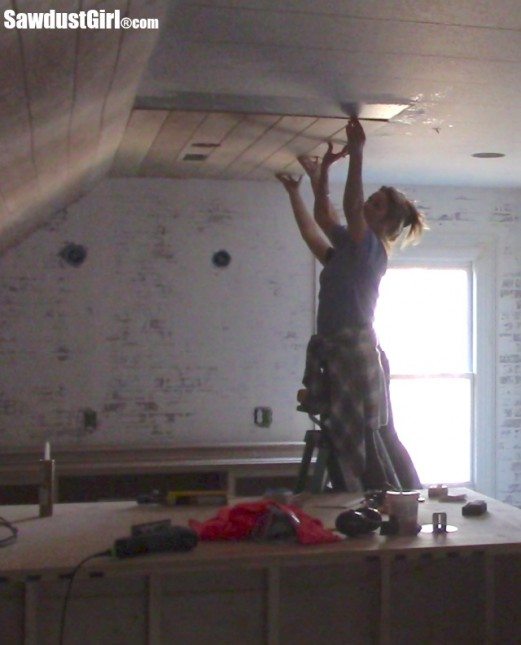
For the most part we flew through applying glue and nailing up the planks. Each plank is simply butted up to the next one. The bevel on both planks forms a V when they are combined.
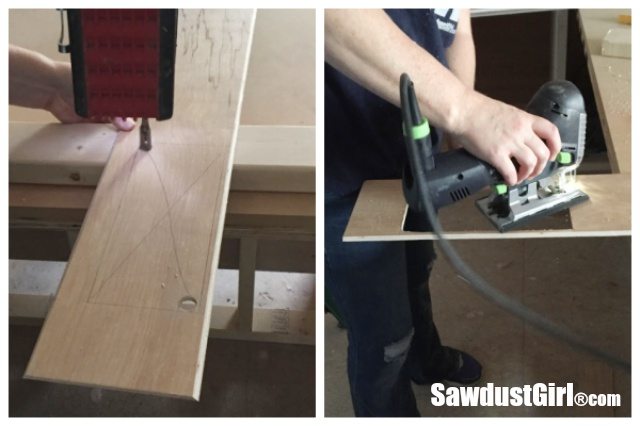
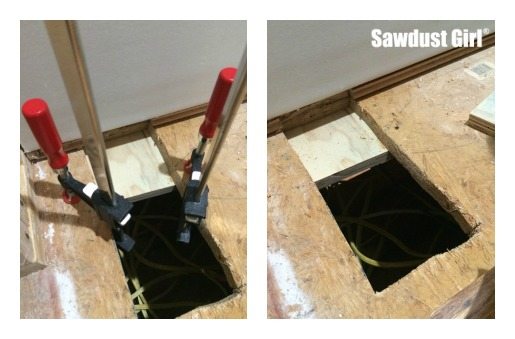
I cut out the light and vent holes with a jigsaw.
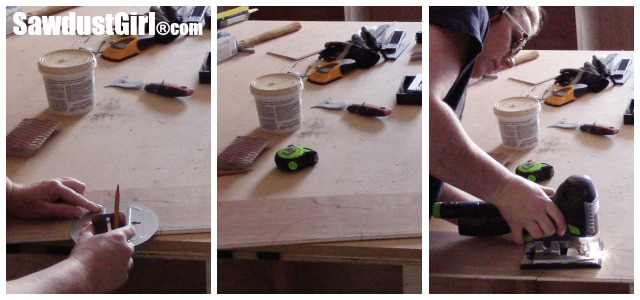
For the lights, I used a template that came with the recessed cans to ensure I cut out the correct size hole.
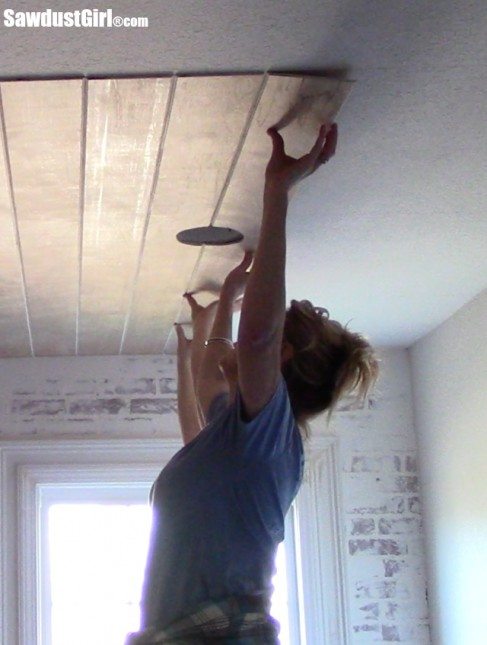
I did not stagger my planks but rather installed them in 8′ wide sections. I’ll cover the seams where the sections meet after I prime and caulk. I shared a lot of pictures of this process on Instagram and facebook and a lot of people loved the look of the bare plywood plank ceiling and you could certainly leave it bare. My ceilings are only 8′ tall at the tallest point and I always planned to paint them white to make them feel taller and make the room feel more open, larger, brighter…
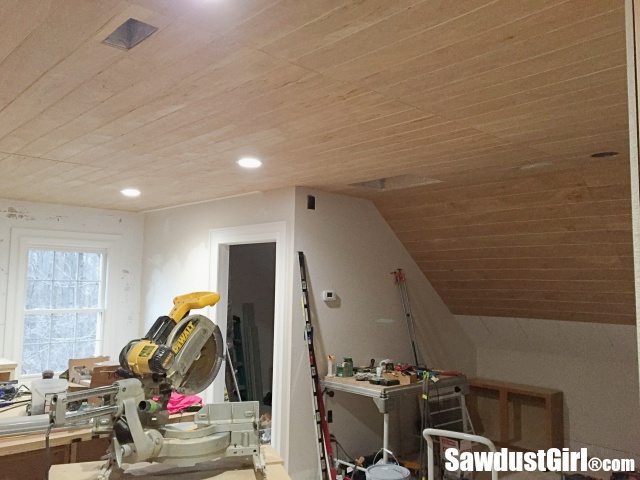
Before painting I filled all the nail holes and sanded. Then I primed.
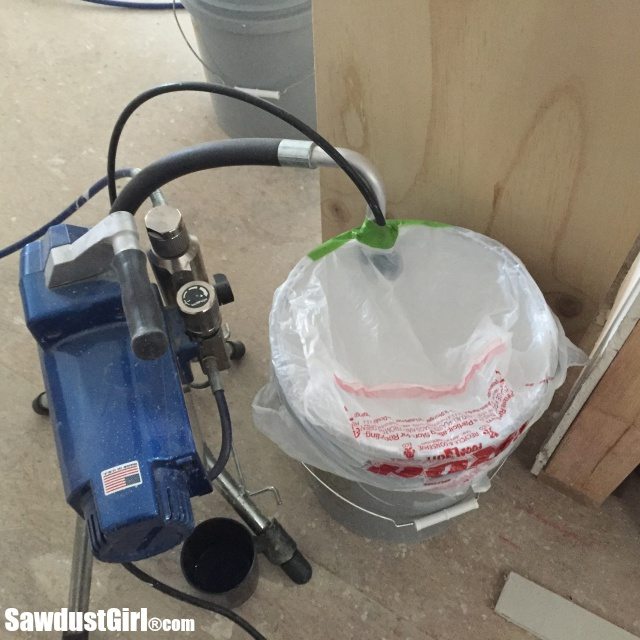
I sprayed both the primer and paint with my airless sprayer. I used a 515 black tip in the orange nozzle that came with the sprayer for both as well.
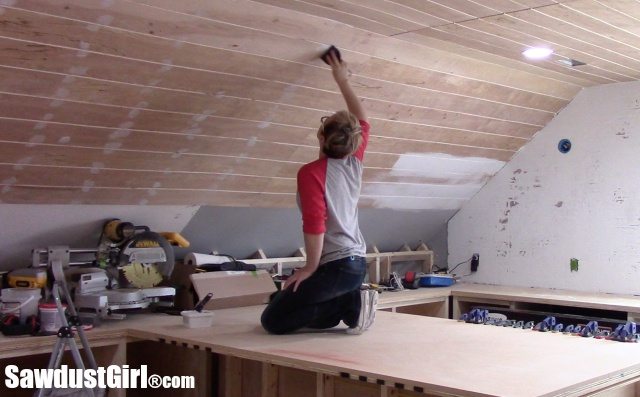
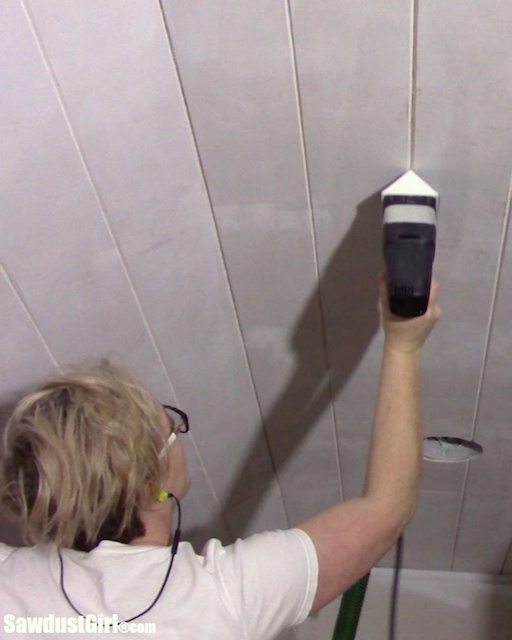
After priming I sanded all the V grooves. I started out sanding by hand with a sanding sponge but that was way too much work. The cut plywood edges were quite rough and even with Penny and I both working on it, we were not making much headway. I ordered a Festool Linear Sander on Amazon and in two days I was sanding like a boss.
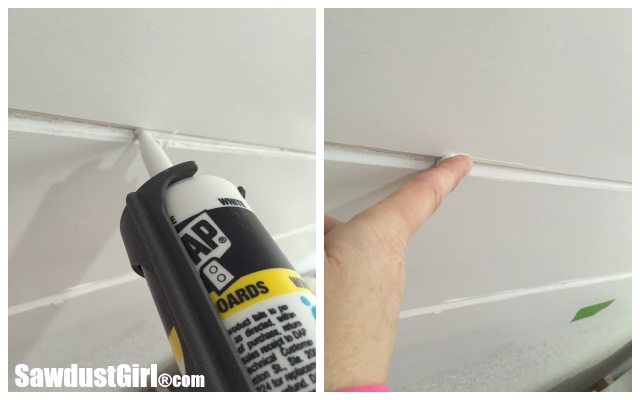
After sanding Penny and I caulked until our fingers bled, literally. What roughness I couldn’t sand away, we covered with caulk. Squeeze in a large bead caulk and spread that into the groove with a wet finger. Follow that up with a damp sponge and move on to the next groove.
After the caulk dried I applied a coat of paint. Then Wes helped me install my boards that would cover the seems. I bought primed pine 1×5 for this. I would love to have put up chunky beams but … low ceilings and all. The 1x’s will have to suffice. I applied another coat of paint and now it’s done!
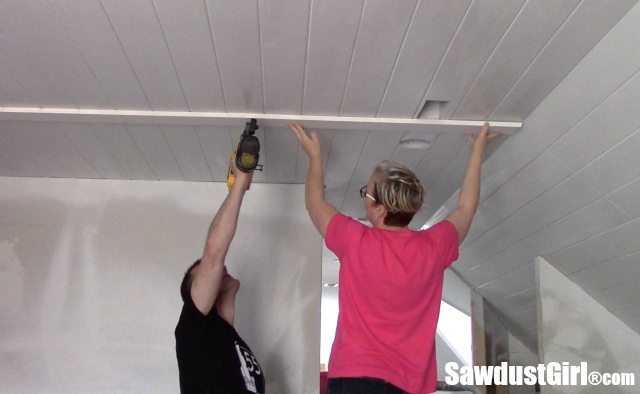
Done done done!
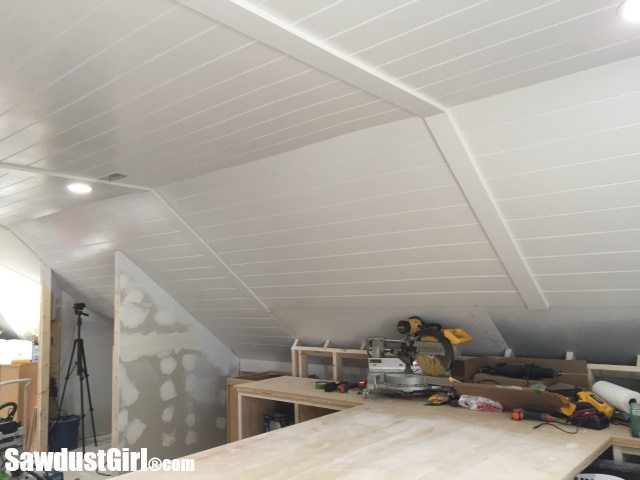
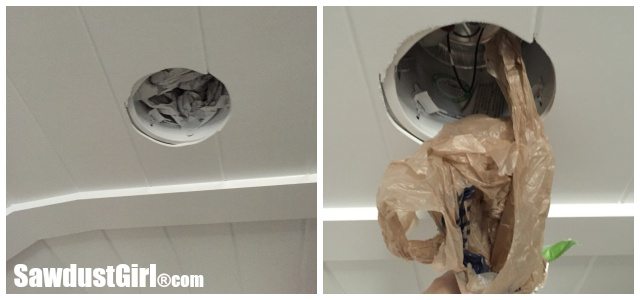
In case you were wondering…to protect the light sockets, I wadded up plastic grocery bags, shoved them up into the cans and secured them with some painter’s tape.
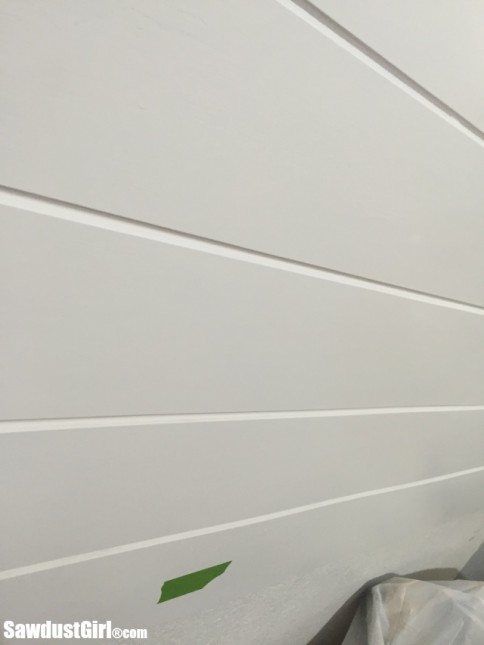
Here is a close up of the V Grooves after all that. My plywood plank ceiling looks almost exactly like my 1×6 Pine tongue and groove ceilings I have elsewhere in the house. But for a fraction of the cost.
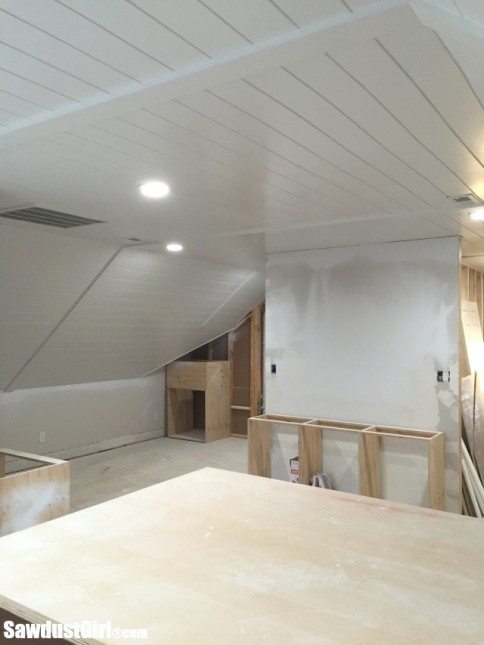
I couldn’t be more pleased with how it turned out and the fact that I spent less than $400 on materials puts me over the moon. Even with the additional cost of the $400 sander and the $80 laser level I bought for this project I’m still $2000 under what the Pine tongue and groove ceiling would have cost me. Which is great because I still have a lot of materials to buy for other projects.
I’ve still got a long way to go but every day is exciting!
Big thanks to Zircon Corporation for partnering with me on this project. Follow Zircon on facebook for great tips, projects and ideas!
Liz Miklya says
Hi, I just discovered this amazing plywood plank ceiling project! Amazing! I want to do it in the basement of our small cabin. Question- why do you need to caulk the grooves? Did you caulk all the grooves or just the ones you had difficulty getting smooth? I plan to stain the planks instead of painting them. thanks for any advice!!
Sandra says
Mainly because the edges (creating the V groove) were really jagged, with lots of voids –because the underlayment was such a cheap product. Inexpensive project but more labor intensive. In order to stain, it would need a lot of stainable wood filler (I would imagine).
Katie Cooper says
Hi! We are going to do this project. What type/size of table saw do you recommend?
Sandra says
Whichever table saw you have access to.
Sara says
Sandra,
What an amazing life hack! Seriously glad this was still out on the internet after so many years. You might have just saved us thousands on our renovation project!! I really hope it works on popcorn ceilings!
Brian says
If you were me would you put this directly over the top of popcorn or do you think it needs to be scraped first?
Sandra says
Since you’re working with very thin material, the popcorn may make it hard keep the planks flush with each other. I guess you’d just have to give it a try and see if you’re happy with the results.
Sara says
Hi Sandra, we are considering doing the same thing. Did it work mounting them on the popcorn ceiling?
Sara says
Oops, meant to direct that one to Brian 🙂
Marcus says
Could I do this without having a drywall backing? Straight into celling joist. Afraid of sag.
Sandra says
This is really a treatment to existing rooms. If you don’t have drywall, you’d need something more substantial than thin plywood to separate rooms or attic space…
Danielle Mangual says
This is beautiful! thinking about doing this for our ceilings through the house. How long did this whole project take you?
jjlivin says
Wow. Seriously incredible work. Thank you for the great post and video. My fiance and I will be redoing our slanted-popcorn-ceiling of our attic bedroom using your ideas!
Anne Smith says
I have popcorn ceiling everywhere! I want to add rustic touches to my traditional home, and I was wondering if I could buy 1/4″ plywood sheets of beadboard or plank ‘wood’ design and put beams on the joints (maybe coffering, if needed), probably staining rather than painting. Did you think the sheet of planks didn’t look like real planks enough to use? Any thoughts or advice would be appreciated! Thanks…and your ceiling looks great…and you’re a really hard worker!!
Sandra says
I used beadboard sheet as the base for my box-beam ceilings in my kitchen and dining room. That works great if you can plan it so the ends will be covered by something (like beams).
Penny Grunow says
Im hoping my ceiling turns out like this !! thank you so much for all the info !
Nicole says
Amazing! This is exactly what I want to do in our playroom, which has a similar ceiling height – however we have 5 kids and no tools so I might have to find a carpenter and give them your instuctions! Thank you so much!
Douglas says
About a year ago I did the same in my hallway. It’s very long and at one point 9 1/2 feet wide so the finish on the ceiling by myself and quickly led me to this. The only difference is I painted the planks a light Grey with the 1x 4s remaining white. I also beveled the planks and sanded them at the same time with a fiscal sander on my table saw. Keep up the good work!
Jenn says
I love it when people come up with more cost effective ways to tackle any project!
Brian Raider says
Looks great! Would you mind letting me know the color paint and sheen? Thanks
Tiffany says
Absolutely beautiful and such a great explanation. I’d love to do that to the vaulted ceiling in my family room but I’m not sure I’m brave doing to do that install 12 feet up. I’ll dig through your projects to see if you’ve done vaulted ceilings. Thanks for sharing this gorgeous project.
Sandra says
I haven’t done it on a tall ceiling. You could rent scaffolding though.
Donna says
Your faux tongue and groove pine ceiling is spectacular!!!
You are my HERO Sandra!!!
Jill Jennings says
This is such a HUGE help! My husband and I have been trying to figure out a cost-effective, modern solution for our horrible popcorn ceilings. I think we may have a winner! Thanks for all the detailed instructions!
Sandra says
I’m with you. I HATE popcorn ceilings. WHY!??! Why did anyone in the history of ever think that was a good idea? LOL
Stephany says
Sandra you continue to amaze me! The ceilings turned out beautiful. I have a breezeway that currently just has blandex on the walls and ceiling – not very appealing. This may be just the solution to my problem. Thanks for always sharing your expertise.
Mike says
Beautiful job. I am not a carpenter by any stretch of the imagination which may be apparent by my question. Instead of ripping the plywood into planks and then having to bevel them, why not just use a router and route a v shaped groove into the plywood to give the illusion of separate planks?
Sandra says
Copy/pasted my reply to same question ahead of you in comments. LOL
If you simply routed a V into 1/4″ plywood you would end up with a very shallow V-Groove which wouldn’t mimic the look of a true 1x tongue and groove plank. Also, routing six V-Grooves into the full length of a 8′ sheet of plywood would probably take more time than what it took me to rip and bevel. I only spent 15 minutes per sheet ripping and beveling to create 8 planks.
Annet M says
So glad for the whole tutorial! I’m definitely going to prime prior to install though (I think you said on fb that you painted after because of space issues?) cause I hate reaching over my head with a passion (why my ceiling in the kitchen is still needing another coat of mud. Now.). THANKS!
Sandra says
If you have room to lay the planks out to dry, priming and painting first will save you some pain. LOL I hate working over my head too!
Sharon C says
Wow, the ceiling looks sooooo A-M-A-Z-I-N-G. Awesome job as always……well done!!!
Sandra says
T-h-a-n-k-s Sharon! LOL 🙂
Janet A says
The quality of your work is so impressive. I can’t believe the time consuming steps you take to make things right, even on a massive ceiling like this one. I’m dragging my feet over a powder room ceiling! Thanks for setting me onto a good stud finder. My current one really sucks. There is one that This Old House recommended but it’s $60 and that’s been too painful for me to spring for. I’m totally going to buy this one right now! I hope you get some kickback from it.
Sandra says
I think I paid $40 for my first Zircon stud finder and Wes and I were blown away at how much better it worked that the ones we’d used before. That was YEARS ago. This new one I have is even better and cheaper! win/win Good luck on your powder room ceiling!
Tammara says
Beautiful! Love the grooves. Q – Was it necessary to add the ‘beams’?
Sandra says
Thanks. You could stagger the planks. I wanted the beams to break up the long lines.
missy says
wow, looks incredible!! i’m jealous of your skills!
Sandra says
Thanks. Skill comes with practice — don’t be jelly just pick up a tool and start practicing! 😀
Feral Turtle says
Brilliant! I am going to do this instead of the styrofoam ceiling tiles this time around. Thanks for a wonderful idea. Pinning.
Laura M says
Gorgeous!!!
Timisha says
Wow your ceiling looks amazing!!!!
Julia Dettling says
As always it looks fantastic! I am about to do a ceiling like this in our master bath. Would it have been easier to sand your grooves before you installed so you didn’t have to have a special sander? Not that I mind buying another tool but I HATE doing overhead work like that. Thanks for the detailed instructions!!
Sandra says
It would be less painful not to have to sand above your head but I don’t think it would be easier. 1/4″ plywood is flimsy. You would either have to stand it on edge and keep it from flapping about while you tried to sand it while holding the sander at the right angle and attempting to put enough pressure against the plywood to resist the sanders force pushing against it — or you’d lay the planks on a table, pulling them slightly over the edge of the table so you could sand at an angle and the sander wouldn’t hit the table ruining the sand paper very quickly. 6 in one hand half dozen in the other? You can always do things in many different ways. You just have to figure out which way works best for you! 🙂
Andy says
Did you consider routing the grooves and installing the panels instead of ripping?
Did you consider priming and or painting before ripping? Or after ripping and before installation?
I’m going to install a basement ceiling soon so I’m looking for all simple solutions.
It looks fantastic.
Sandra says
If you simply routed a V into 1/4″ plywood you would end up with a very shallow V-Groove which wouldn’t mimic the look of a true 1x tongue and groove plank. Also, routing six V-Grooves into the full length of a 8′ sheet of plywood would probably take more time than what it took me to rip and bevel. I only spent 15 minutes per sheet ripping and beveling to create 8 planks. Priming and painting before installation is always a time saver provided you have somewhere to do it. That’s a lot of planks to lay out to dry.
J Glanton says
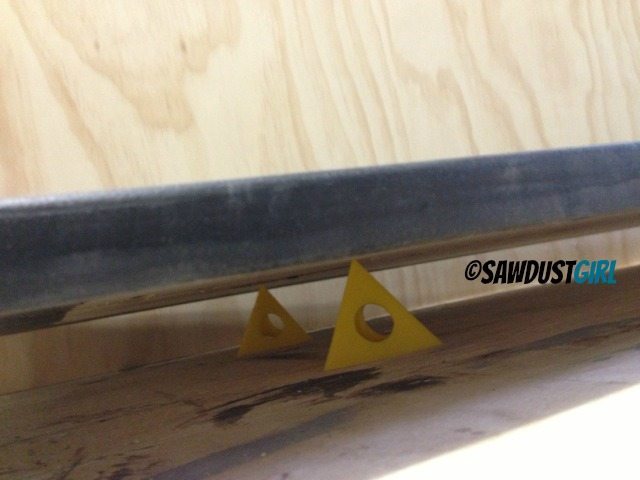
Priming the thin plywood and drying on painters pyramids caused my boards to warp. I would not do this!
Sandra says
Yeah with thin strips like that it’s definitely best to install first, then prime and paint.
Douglas says
I sprayed the whole sheet with primer then ripped them down to size. Then I sanded the primer with a quarter sheet sander so they were ready for paint after the holes were filled.
Janice says
Oh my goodness! This looks amazing! I did something similar to my entry way wall using plywood. It looks AWE_mazing on the ceiling. Definitely pinning this for a future project!!!!
Nancy williams says
Hey there from Raleigh,
Wow! The ceiling looks really great and the paint finish is fabulous!
Congratulations!
Nancy
Sandra says
Hi Nancy! Thank you.
Lisa says
As always Amazing work!
Christina in FL says
Brilliant and gorgeous!!! I love all the details you share.
Sandra says
Thank you so much Christina.
Anita says
Ok…I know this might seem totally random, but I have 3 old grain bins which I’m hoping to convert into usable space–specifically, a small commercial kitchen in one with the hope of one day joining them all somehow. At first, I wanted to convert them into an guest space. I digress. Ok…my thoughts are someone else will have to come in & do the door/window openings–to ensure no structural compromises. Afterwards, however, I was hoping to join hands with my son (he had 3 years of carpentry), my husband, and maybe the other 3 sons would help somehow too. While I have some carpentry skills, this would be a total first for me (studs to finish). Do you think I should tackle this or leave it to someone in the industry?
Sandra says
I certainly don’t have enough information to even attempt to help you decide if this is something you could tackle on your own. That sounds like a really big job. I think you probably know in your gut what the answer is but you are wanting someone else to tell you what your gut is saying…and no one else can tell you that. 🙂
Carol says
Looks terrific and what a great $$$ saving solution to achieve a tongue and groove appearance!
Sandra says
Thanks Carol!