Rolling Tool Cart and Air Compressor Storage
This rolling tool cart with storage for my air compressor, nail guns, drills and other tools I use on a daily basis is one of my best projects to date! I can roll this bad boy from room to room while I’m working on my ongoing 20 projects. It keeps my tools organized and saves my sanity! I’m slowly building lots of organized storage for my tools and lumber in my workshop. But I need a way to keep track of the tools I’m using “on site”. My rolling tool cabinet literally holds EVERYTHING I need while working on a project. It holds all my nail guns and a couple drills, tons of nails and screws, clamps, glue, squares, pencils, extension cords and battery chargers. Literally EVERYTHING. Want to build one? Keep reading!
This post is sponsored by Scotch Brand.
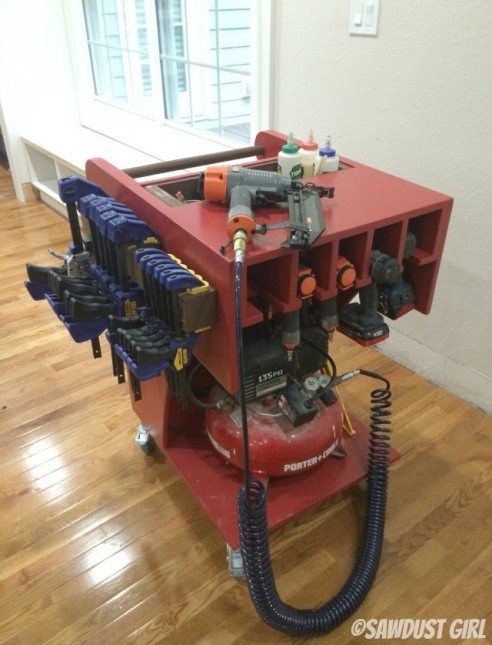
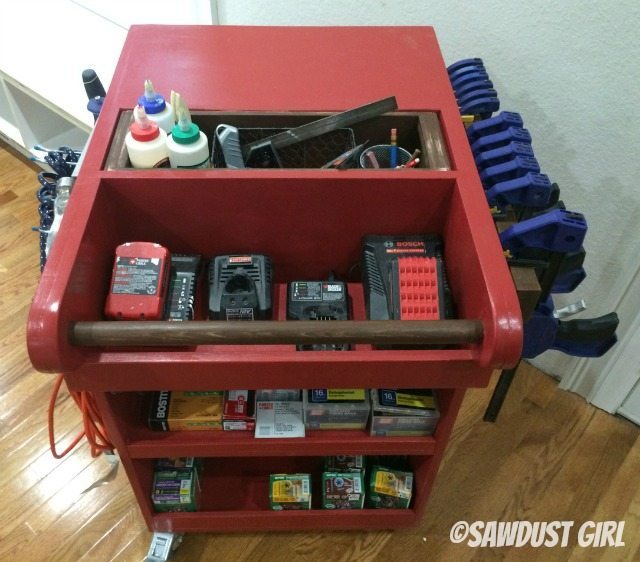
Rolling Tool Cart
Materials:
- 3/4″ plywood
- 1/2″ plywood
- 1 1/2″ wood dowel
- wood glue
- pegboard
- 2×4
- furring strip
- 4 locking swivel casters (3″ is what I used)
- 1 1/4″, 1 3/4″ and 3″ screws
- Scotch Bundling Straps
Build it:
I designed this cart to hold my pancake compressor and my nail guns and drills — so you’ll need to measure your own tools and make sure to modify any part of this cart tutorial to fit your tools.
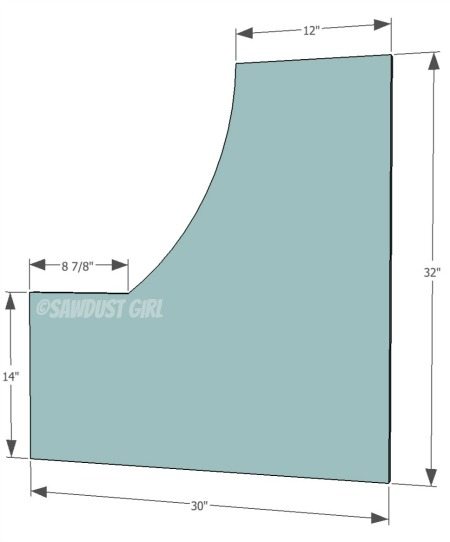
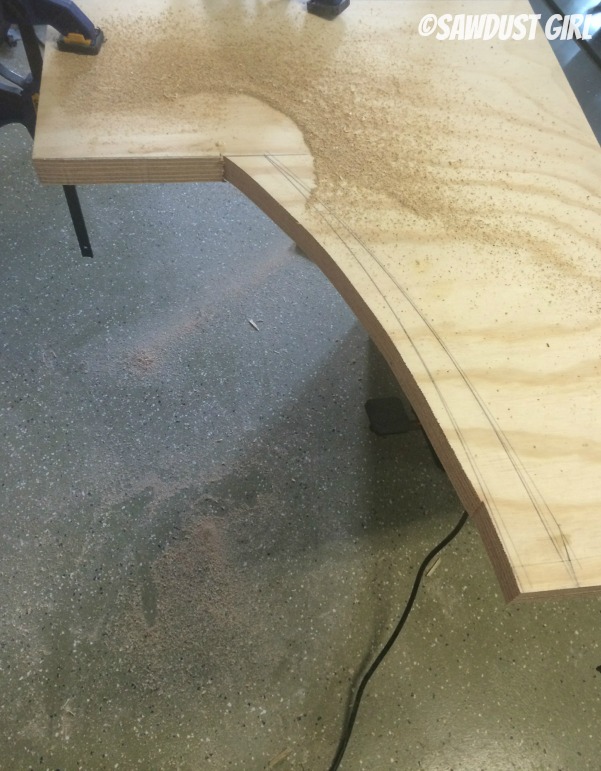
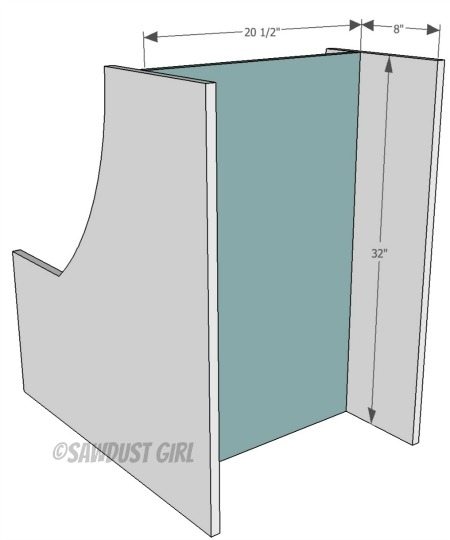
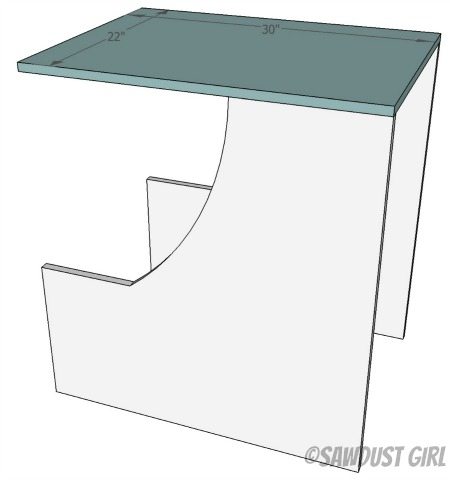
- Cut sides out of 3/4″ plywood as shown in diagram to provide easy access to air compressor.
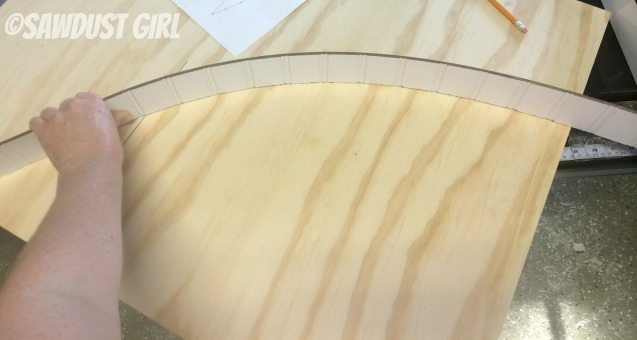
- You can use a piece of thin MDF or plywood to create your curve. Just put a nail on either side where you want the curve to start and end and then force the wood to bend to the angle you want it.
- Use a jigsaw to cut the curve.
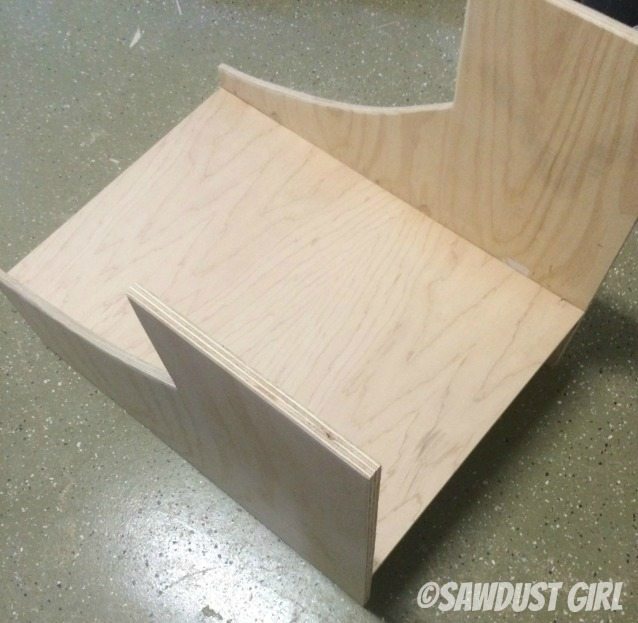
- Secure 3/4″ divider to sides using wood glue and 1 3/4″ wood screws.
- Divider is 8″ from cart cart back.
Storage for Drills and Nail Guns
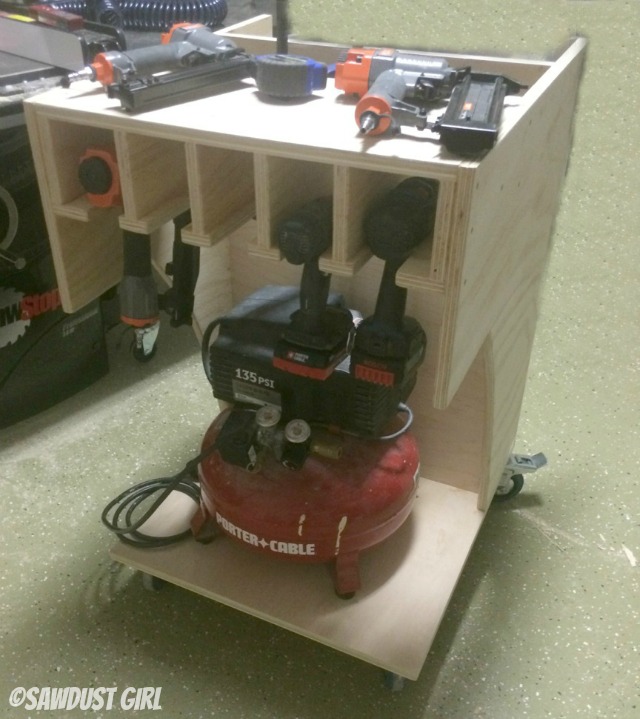
- Next I build the section that will become the work cart “top” as well as the nailer/drill storage section.
- For this part, it’s really important that you measure your nail guns and drills to see how tall this section needs to be, how wide each box needs to be and how narrow a space you need to create at the bottom to allow your tools to slide IN but not FALL OUT.
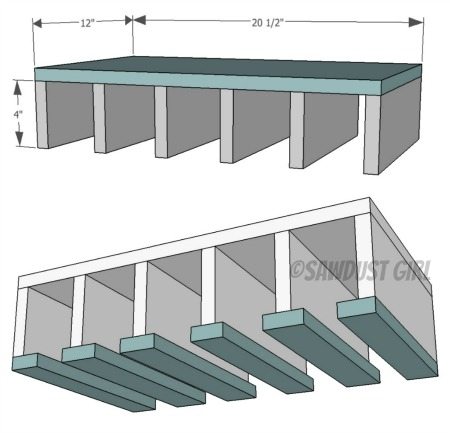
- This entire section is 3/4″ plywood.
- Dividers are secured with wood glue and 1 3/4″ wood screws.
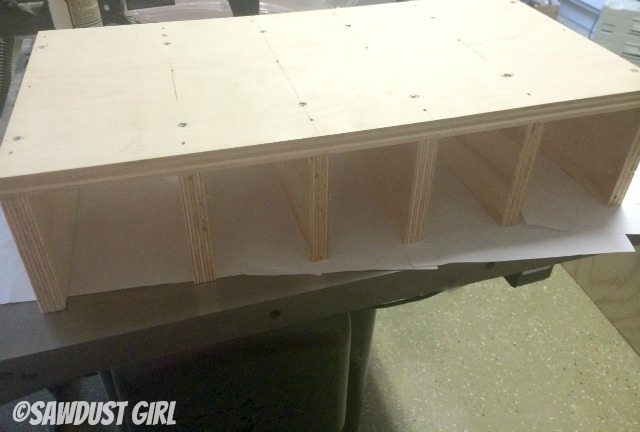
- Each section has a different sized bottom plate to secure my specific tools in each compartment.
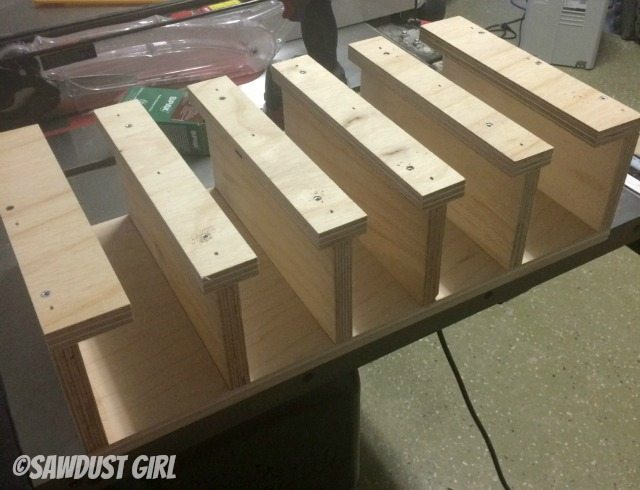
- Once that part is build, use glue and 1 3/4″ wood screws to secure it to the “TOP” of the cart.
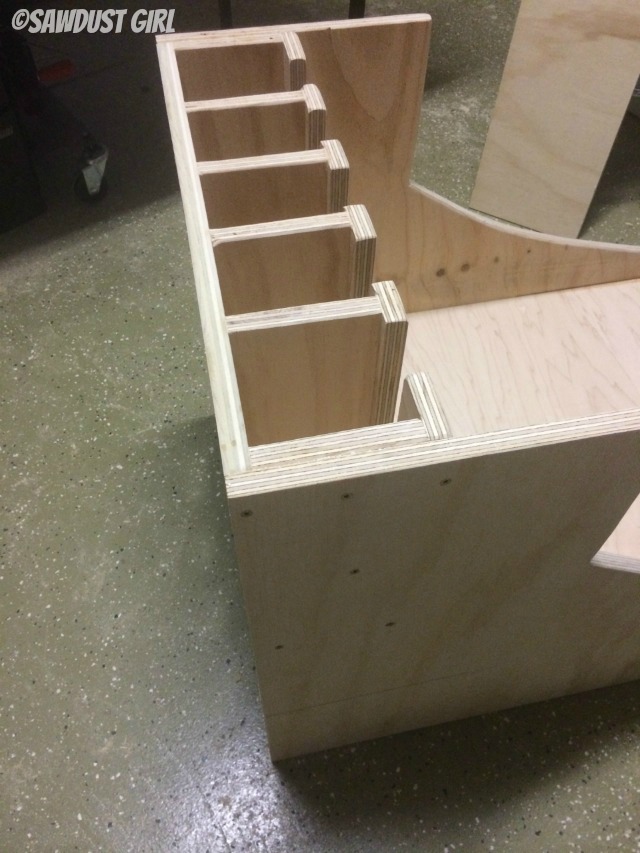
Casters
- Now is a good time to flip the cart upside down and install the bottom and casters.
- Use wood glue and 1 3/4″ wood screws to secure bottom.
- My cart has 4 locking, swivel casters so I can pull it in any direction and roll it around in a circle to access all four sides but lock it in place so it won’t roll away if I’m on an uneven surface.
- You may choose to use different casters to fit your needs.

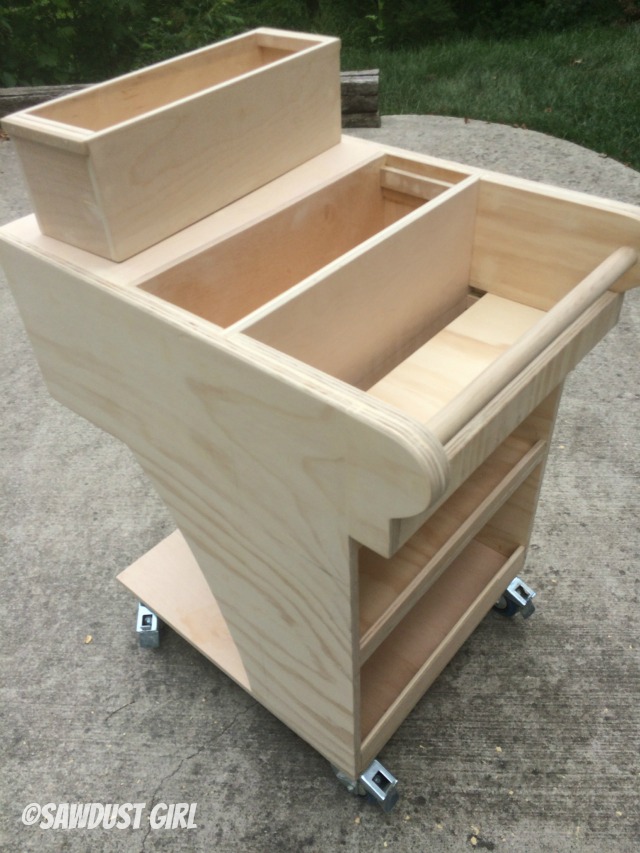
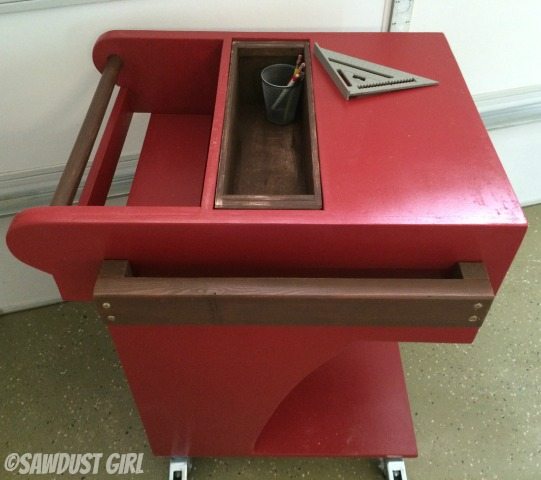
Flip the cart right side up and this is what it should look like so far!
Pull out tool caddy
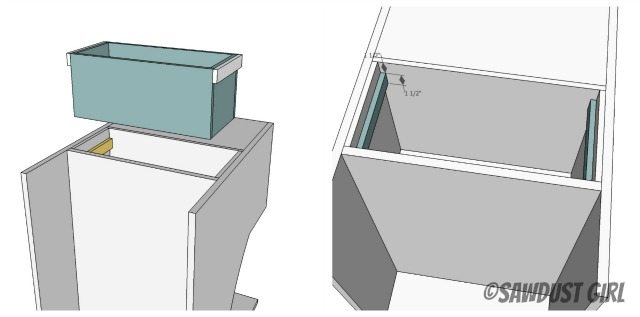
- There is some space behind my nail gun/drill storage section and above my compressor that I didn’t want to waste so I built a 3 sided box out of 1/2″ plywood to fit into place (the cart divider became the 4th side of my box).
- This space will be different depending on the height of your compressor and depending on how deep you built your nailer/drill section.
- Secure this box to the cart sides with wood screws.

- This space is most likely a very deep cavity which is not the most functional way to store tools — everything piled on tope of each other. Avoiding that is the reason why I built this thing in the first place!
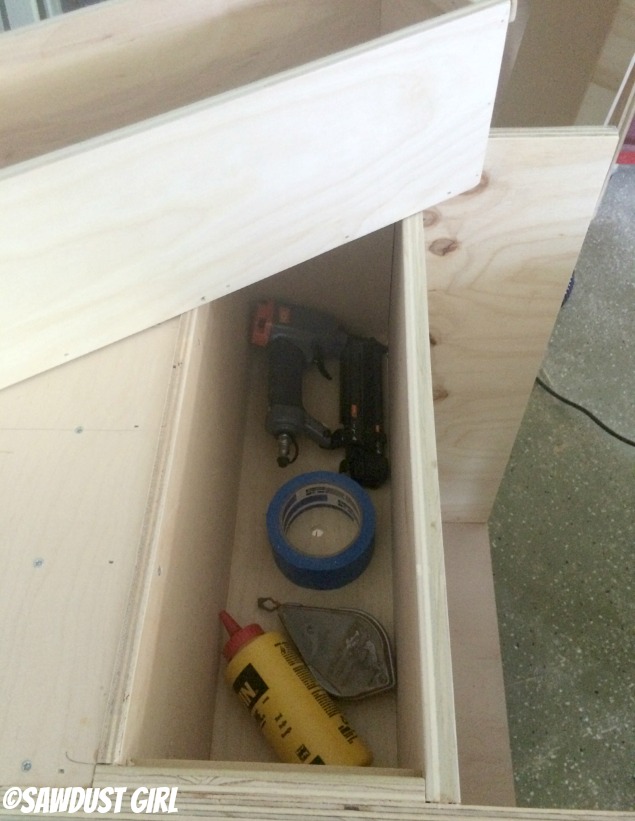
- I built another box to fit inside, taking up about half the depth.
- This box is slightly smaller on all sides so it will slide in and out easily.
- Leave space on the sides to install a cleat on both the box and inside pocket to hold box in place.
- Cleat is 3/4″ plywood and about 1 1/2″ tall.
- Drill several holes in the bottom of the deep box too allow air to escape when the smaller box is put in place.
Shelves for additional storage
- Use small wood cleats (whatever scraps you have laying around) to secure shelves in that 8″ space we left in the back of the cart.
- Depending on what you want to store here, you’ll want to adjust the quantity and height of your shelves.
- Create one shelf that leaves a 2″ gap in the back. Battery chargers can sit on the shelf but the cords fall through and can be stored out of the way under the shelf.
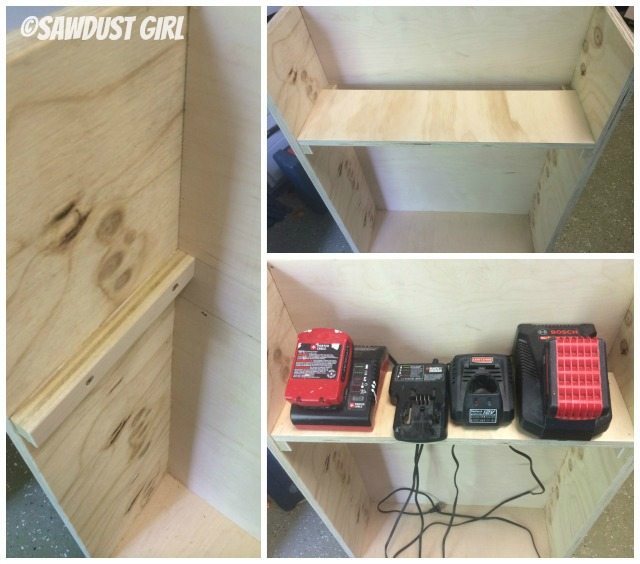
- I installed 1/2″ plywood “aprons” on my shelves so things would not fall off.
- Use glue across the bottom of this apron and secured on the side with screws.
Handles
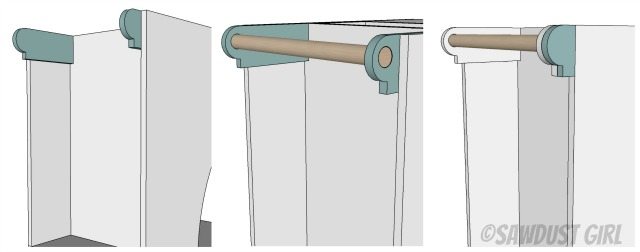
- Use plywood about 5″ tall and 13″ long and shape the ends as shown in my drawing.
- Cut holes for a 1 1/2″ wood dowel.
- Insert dowel.
- Trace the shape of the handle that is showing on the outside of the cart.
- Cut that out and glue and screwed it into place. *These pieces keep the dowel from falling out.
- Add a 1/2″ strip of wood across the font of the cart (at the bottom of the handles where it is flat) to create another shelf “apron” to keep your battery chargers in place.
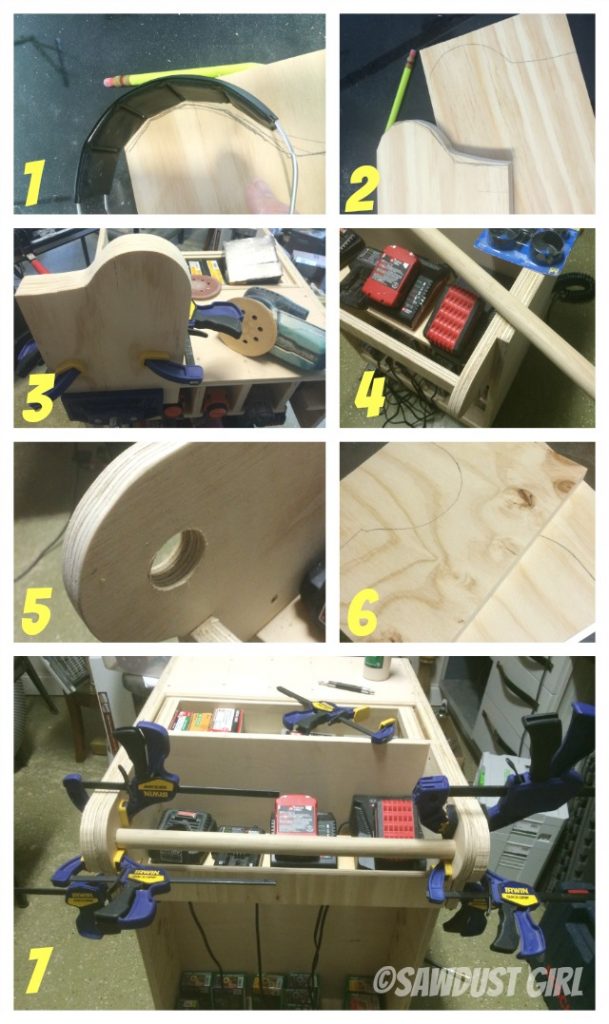
Now you just need to fill ALL those screw holes and sand all the edges super well. No one likes rough plywood edges that snag your sweaters and give you splinters!
Finish with poly or paint
Now protect your work cart in whatever way will make you happy. Since it’s plywood, I chose to paint mine.
- I chose to paint my cart red but protected the handle so I could stain and poly that as well as the storage box. I wanted a little contrast

Now it’s time to accessorize!
Clamp Storage
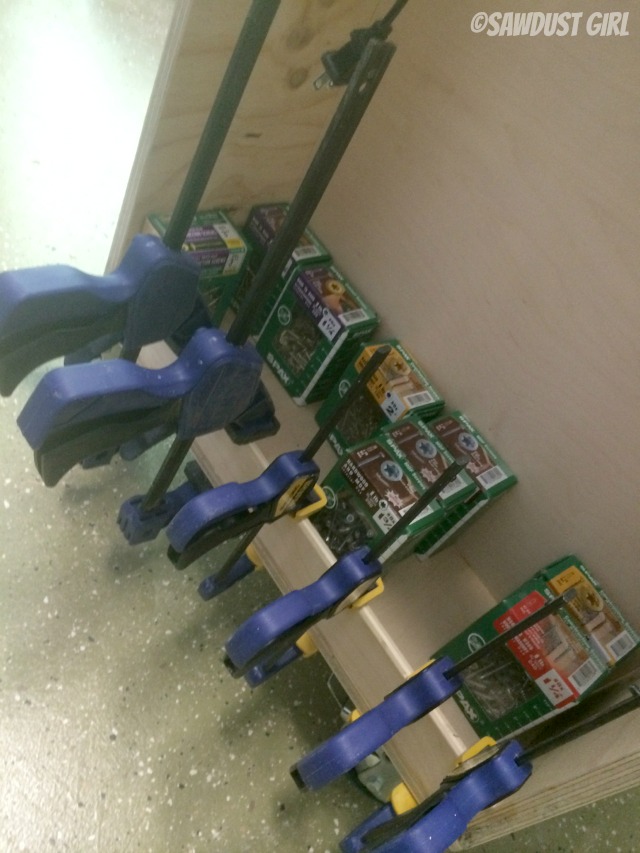
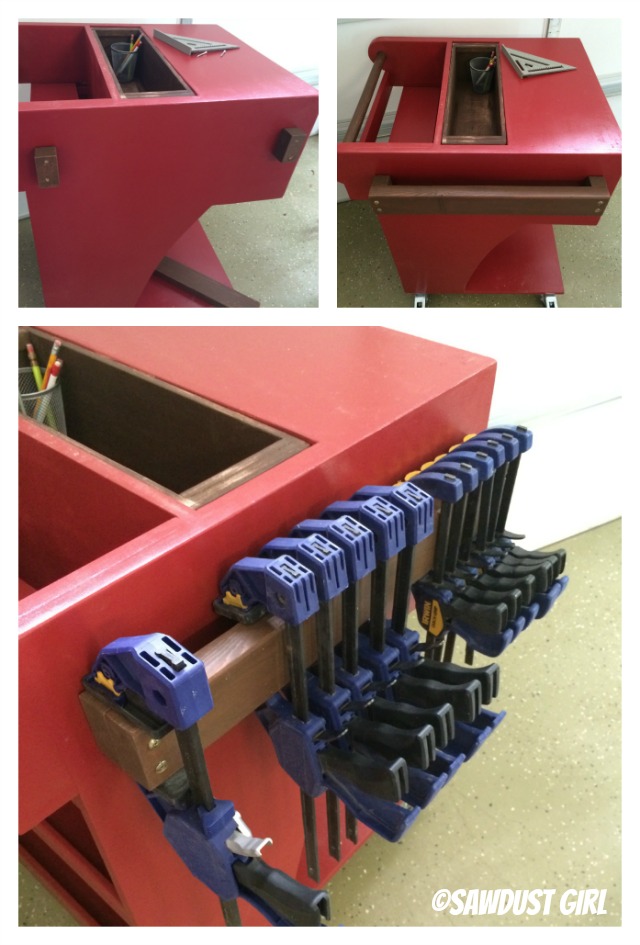
- I installed clamp storage on one side of my cart.
- Secure 2×4 blocks to the cart side and then secure a 2×4 on top of those blocks to create extra depth for wide clamps.
- I used 3″ screws to secure these 2×4’s.
Pegboard Storage
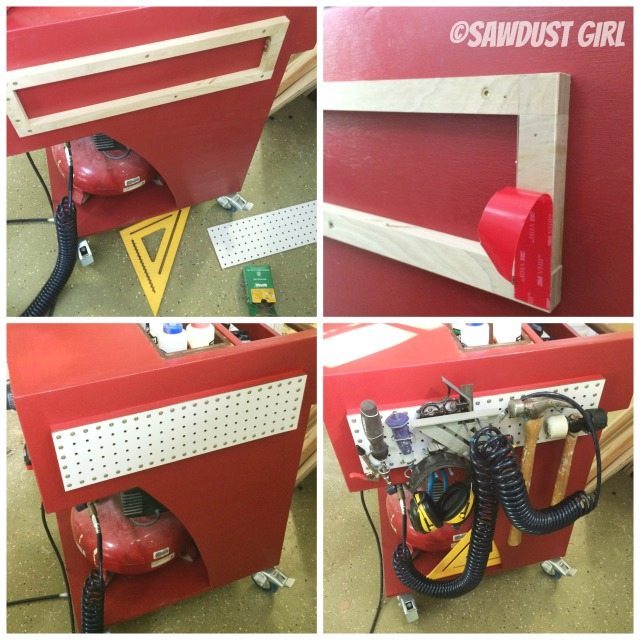
- Screw 1×2 cleats to the other side of your cart to create a grid to hold pegboard.
- Use a bit of double stick tape to hold the pegboard in place to free up your hands while you secure the pegboard to the cleats.
- You DO NOT need to go crazy with the screws like I did! Three screws across both the top and bottom would be plenty. 😀
Cord Management
- To keep those battery charger cords from becoming a hot tangled mess, I used Scotch bundling straps to keep wrap them up into tidy, managed bundles.

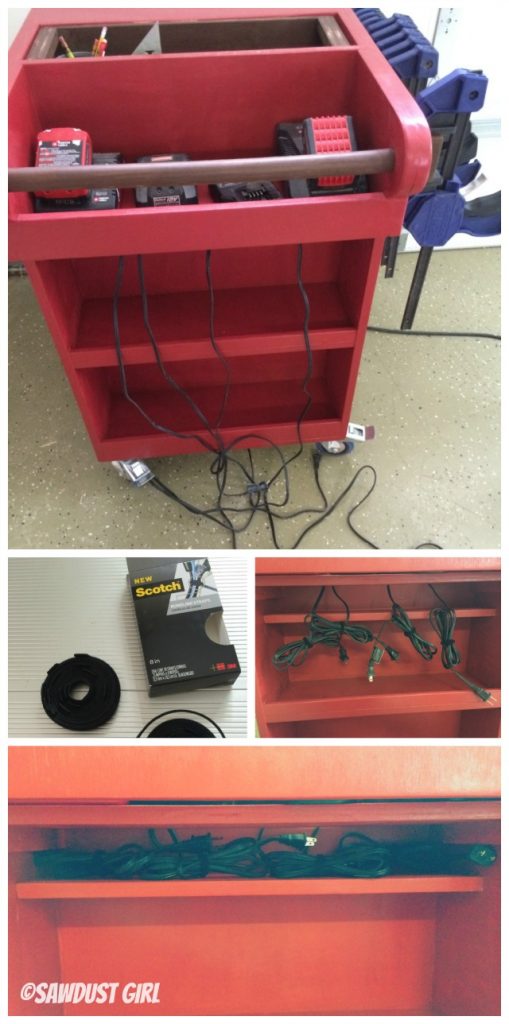
- I created a ledge under my battery charger shelf to hold a power strip so they can all be plugged in at once.
Now, load your rolling tool cart up with tools, supplies and your air compressor!
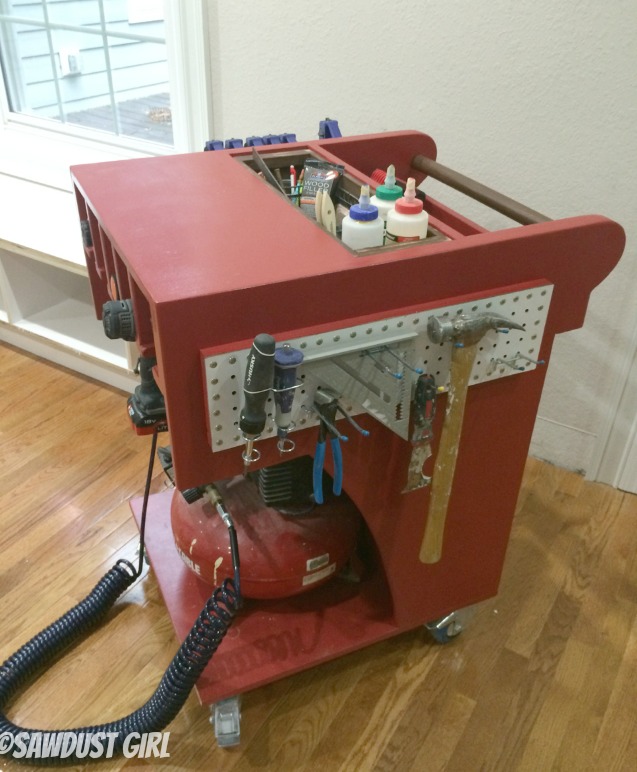
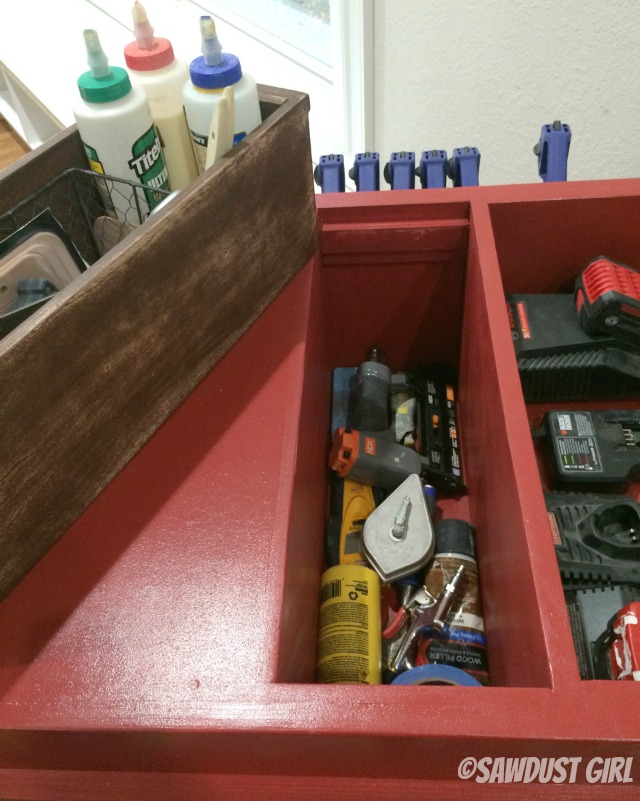
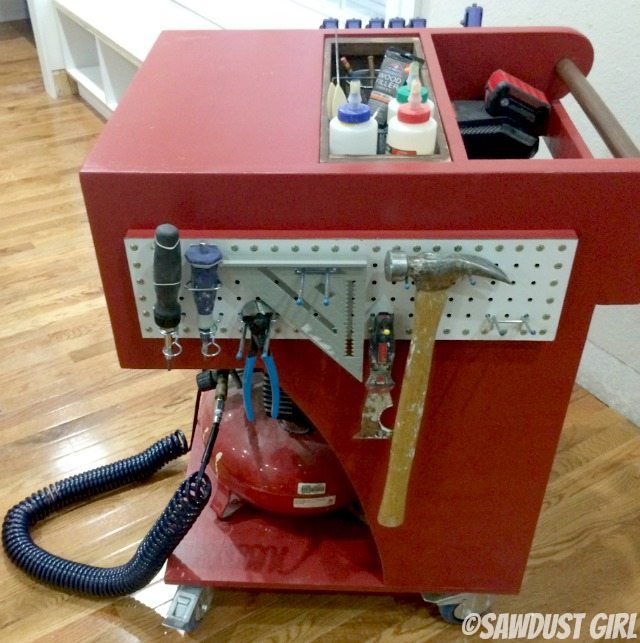
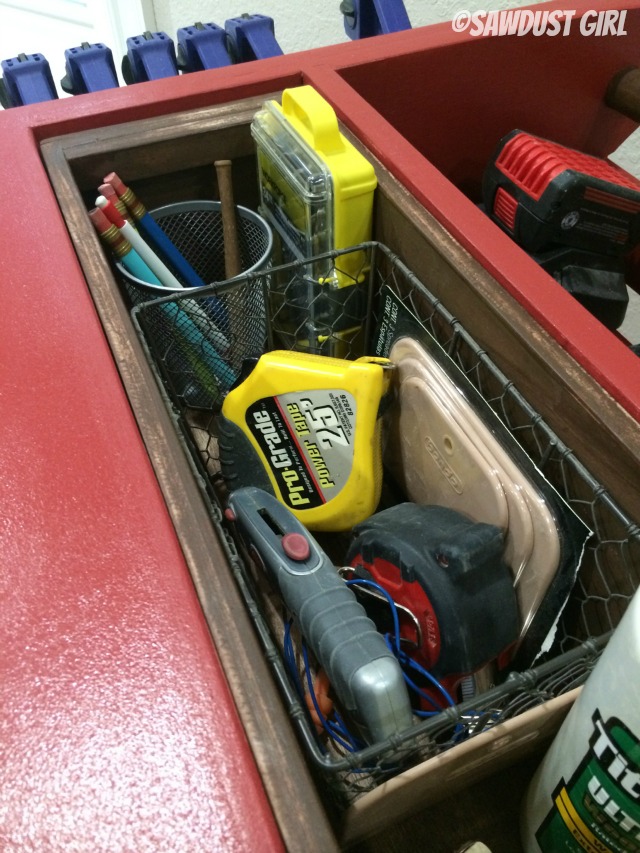
I seriously LOVE using this thing. I have never been so organized with this much tool storage in a rolling work cart!
If you liked this post, check out my other free plans and consider sharing!





So, I googled “can I put wheels on my pancake compressor”! Wow, this would really take my organizing to the next level. I just hate having the compressor be stationary on the ground and all the attachments splayed all over. I’m not sure I can make this as nice (I hit a slight panic as soon as the instructions mentioned jig saw), but I think I’ll go find my big-girl pants and sign up for the mailing list!
Great looking project!