• Home
  • About
    • Personal Posts
  • Privacy
  • Shop
    • My Account
    • Checkout
    • Email
    • Facebook
    • Instagram
    • Pinterest
    • Twitter
    • YouTube
Sawdust Girl®

Sawdust Girl®

Renovation, cabinet building and woodworking plans and tutorials. Build like a Girl®

  • My Home
    • Clinton TN House
      • Clinton TN House in Progress
    • Maryville TN House
      • Maryville TN House Tour – Completed Rooms
      • Maryville TN House in Progress
        • Basement
        • Basement Storage Closet
        • Bedroom Office
        • Craft Room
        • Dining Room
        • Entry
        • Garage
        • Guest Bedroom
        • Hallway
        • Jack and Jill Bathroom
        • Kitchen
        • Kitchen Entry
        • Laundry Room
        • Library
        • Living Room
        • Loft
        • Madison’s Room
        • Master Bedroom
        • Master Closet
        • Pantry
        • Porch
        • Powder Room
        • Wes’ Office
    • Illinois House
    • Calderwood Cottage
  • My Workshop
    • Clinton Workshop
  • Build & Breakfast
  • Cabinet Making 101
    • Cabinets
    • Doors
    • Drawers
  • Projects and Plans
    • Countertops
    • Beds
    • Benches
    • Bookshelves
    • Desks
    • Gift Ideas
    • Holiday
      • Christmas
      • Halloween
    • Home Accessories
    • Kids
    • Kitchen Cabinets
    • Lockers
    • Nightstands
    • Organization accessories
    • Recipes
    • Sewing
    • Tables
    • Vanities
    • Wardrobes
    • Woodworking
      • Wood Finishing
    • Workshop
    • Workshop Storage and Organization
  • Remodeling 101
    • Baseboard and Trim
    • crown molding
    • Demolition
    • Door and Window Casings
    • Door Installation
    • Drywall
    • Electrical work
    • Flooring
    • Home Maintenance
    • Painting
    • Plumbing
    • Resources
    • Safety
    • Tile
    • Wall and Ceiling Treatments
  • Sawdust Squad
  • The Sawdust Diaries
    • Andrea
    • Ava D.
    • Beckie F.
    • Cara C.
    • Courtney B
    • Fawn T.
    • Jenn D.
    • Kelly C.
    • Kristy K.
    • Lara T.
    • Malisa B.
    • Marnie D.
    • Robin C.
    • Val F.
  • Tools
    • Products
    • Tool Reviews & Overviews
    • Inspiration & Ideas

How to Grout Tile with a Decorative Profile

All Posts, Remodeling 101, Tile

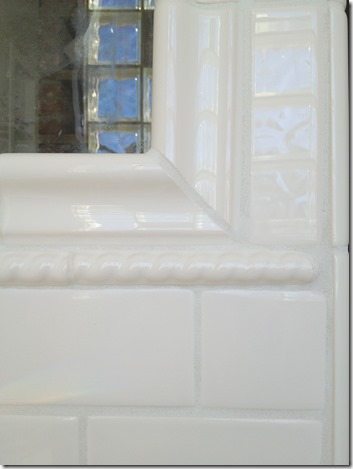
If you want to know how to grout tile, look no further!  Decorative trim tiles add a lot of interesting detail and beauty to a tile job, but their uneven profiles make them a pain to grout.  If you use a grout float, you will probably end up with more grout on your floor than in the grout joints, and it will be difficult to work the grout into the joints properly.

How to grout tile with a decorative profile.

How to Grout Tile

How to grout tile with a decorative profile.

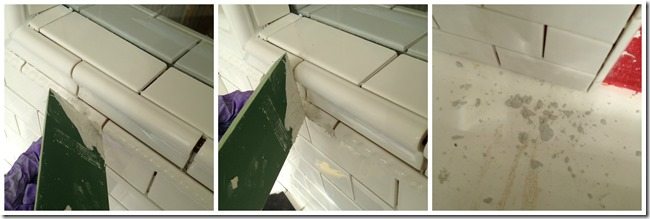
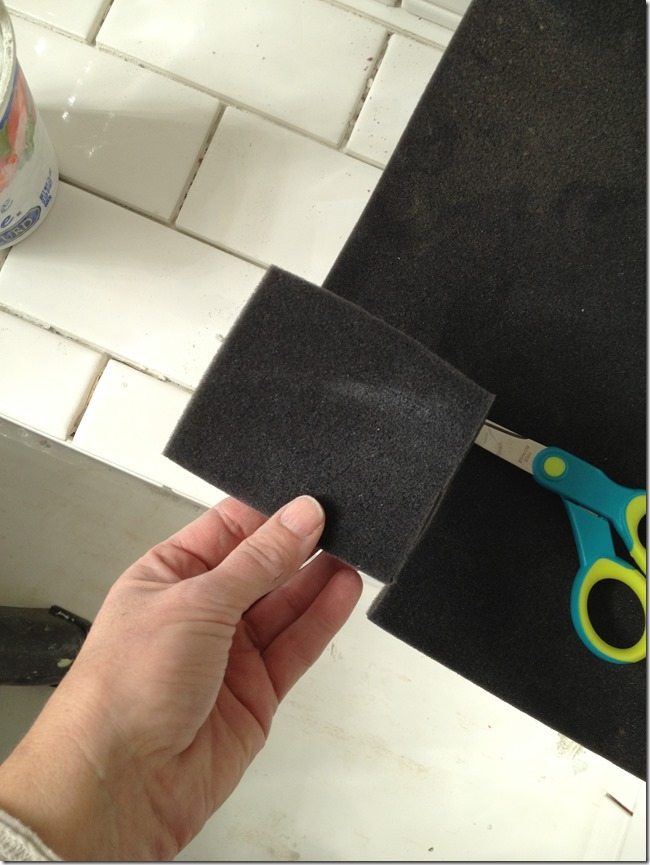
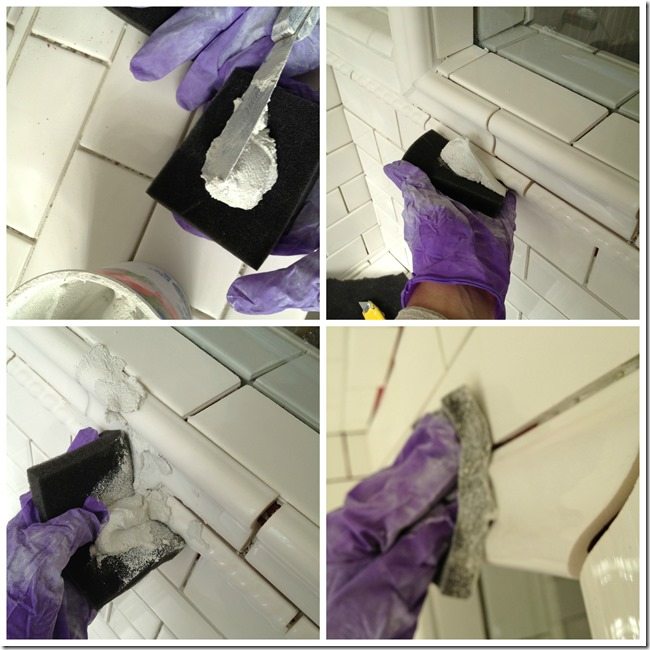
Instead of a grout float, use a pliable dense sponge (this came as packing material for my shower fixtures) or a shop rag. They will conform to the uneven surface of the tile and help work the grout into the joint.

How to grout tile with a decorative profile.

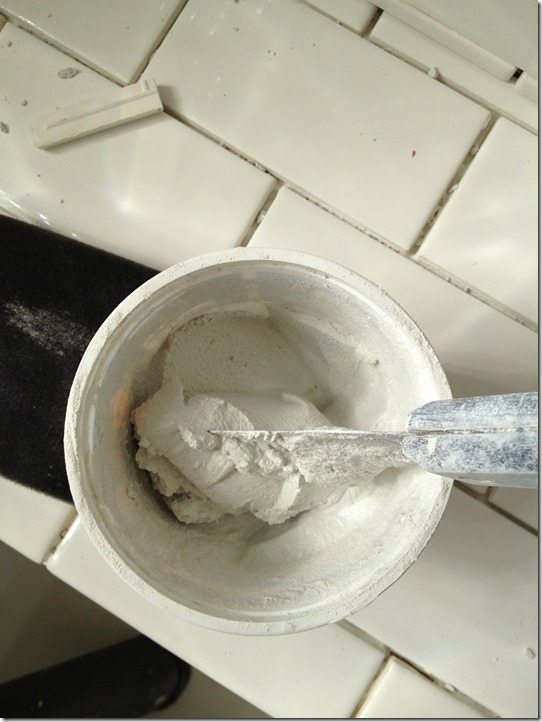
Mix up a small amount of grout to the consistency of peanut butter,  roughly 5 parts powder to one part water (follow proportions on your package).  The grout should stick to your trowel when you turn it upside down and generally keep the same shape (think stiff egg whites, though much more dense). Let your grout slake—give it 5-10 minutes to rest. This allows the chemical reaction between cement and water to begin. Stir your grout again, it will feel a little more stiff and a bit “fluffy.”

How to grout tile with a decorative profile.

Grout contains alkalies that are caustic to the skin so be sure to wear protective gloves!!! When you do get grout on your skin wipe it of with a dry towel or rag as repeated washing may increase the damage.  At the end of the working period, wash the area with water or dilute vinegar until the soapy feeling has gone.

Working in small sections at a time rub and push grout into joints, go over the same area in multiple directions to ensure that each joint is well filled.

How to grout tile with a decorative profile.

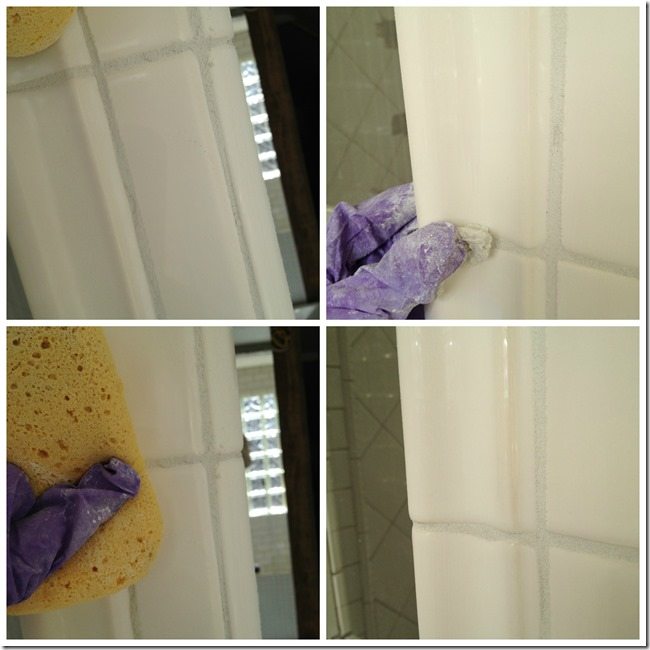
 Once the grout begins to dry, use a damp grout sponge to wipe away excess grout and to tool the grout joints, rinsing sponge as necessary.  If you notice voids or low spots take a small amount of grout and fill, then use the grout sponge to smooth again. Keep wiping until the grout joints are even and smooth. Once you are happy with the appearance of your grout, lightly wipe over tile with rinsed sponge to remove any remaining sand.

How to grout tile with a decorative profile.

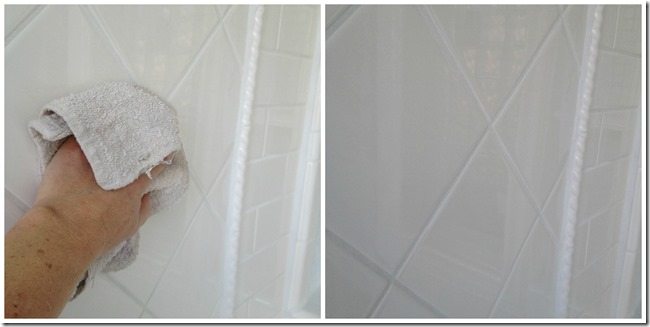
 After the grout is fully dry use a cotton or microfiber cloth to buff off grout haze.

How to grout tile with a decorative edge.

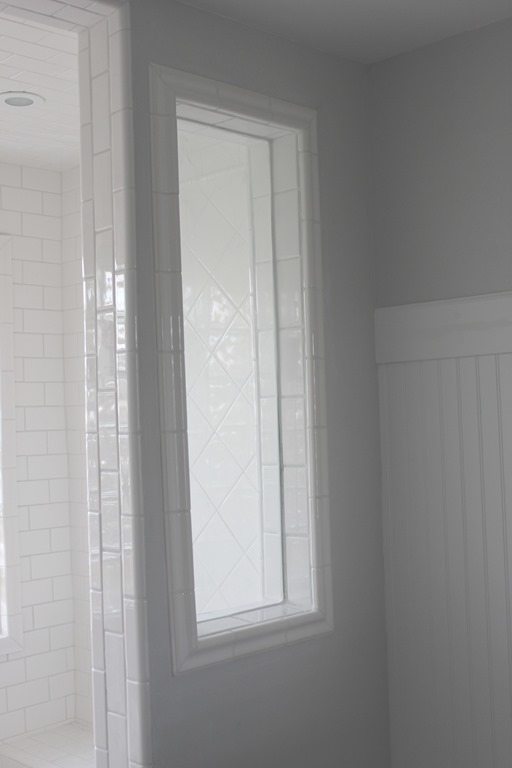
I use this same technique for grouting ceilings—I end up with less grout in my face than when I try to use a grout float.  There you have it—an easy way to grout tile with a decorative profile.

How to grout tile with a decorative profile

In case you were thinking that I quickly knocked out a bathroom remodel…HA!  This post was written by my sister, Julie who remodeled her bathroom and contributed this tutorial.  I can’t wait to knock out my own master bath!

January 8, 2015 · Leave a Comment

« Kitchen Design Ideas
10 Awesome DIY Headboard Ideas »

Leave a Reply Cancel reply

Your email address will not be published. Required fields are marked *

Categories

New Post email notification signup

You Subscribed!

Legal Stuff

Terms of Use

Privacy Policy

Disclosure

Recent Posts

  • Remove Baseboard with the Trim Puller
  • March 2023 Lodge Update- Moved in
  • January 2023 Lodge Update
  • Lodge Update – Floors, Cabinets, Countertops, and Appliances
  • Lodge Kitchen Cabinet Progress

Disclaimer:

Although it is my intention to provide accurate plans and clear instructions, not all plans have been tried and tested. Using plans or information found on SawdustGirl.com indicates that you agree with the Terms of Use policy and will accept full responsibility for the process and outcome of any project you attempt. All plans are for private use only. Plans and information published on SawdustGirl.com may not be reproduced, republished or distributed in any manner without written permission from Sandra Powell, Sawdust Girl. Actual projects built using Sawdust Girl plans may be published on your own site without instructions or "tutorial" as long as you provide a link to my original post with full post title or "SawdustGirl.com" as link title.

Copyright © 2023 · anchored theme by <a target="_blank"