How to Choose a Paint Sprayer to Buy in 2021
First off, I have to say that picking a paint sprayer has been the bane of my existence for the last seven years. Seriously, it’s been one of the most difficult processes ever.
Ever since I mentioned it on Facebook and on my library remodel reveal post, I’ve gotten tons of emails and messages asking for information on the paint sprayer I purchased. So, I decided I’d make a guide to help other people who were in the same boat. Here it is in a tidy package: My 2 cents about paint sprayers, what I purchased, and how it worked for me.
The 411 on Paint Sprayers
Part of the reason choosing a sprayer is so confusing and difficult is because of the extensive range of finishing choices on the market.
If you spend time researching sprayers and reading forums to find out what the experts recommend, you’ll see hundreds of different opinions. Why? Because everyone uses different products for different applications, and there are dozens of paint companies selling dozens of different options for every different application and dozens of paint sprayer companies selling dozens of different sprayers for all those different options and options and options. Yeah…what? If that made you feel overwhelmed, well–that’s where I’d been for a very long time. It’s a very complicated process!
You’ll hear words like latex, enamel, acrylic, alkyd, varnish, urethane, lacquer, shellac. You think it’s done? No, precat, postcat, water, oil, hybrid. It’s enough to make a DIY’er wanna’ cry.
Also, different paint sprayers serve different purposes. Some people use them primarily for painting walls. Others use them for air brushing art, painting cars or finishing furniture or refinishing cabinets… Some people use primarily heavy finishes like latex paints and others use only thin material like urethanes and lacquers.
To keep it simple for myself, I decided to stick with MY FAVORITE finish and look for a sprayer that would spray it to give me a beautiful finish.
I have my favorite paint for painting cabinets and built ins and I use the same paint whether I’m brushing or spraying. I might venture out and try something new once in a while, but for the most part, I stick to what I know works! Why use the same paint in a sprayer? Because I don’t always want to haul out the sprayer. What if I want to add a couple doors to a built in down the road? I’ll apply the finish by hand if it’s not worth the effort of setting up and cleaning up my sprayer for two little doors. I don’t want to store different types of paints or finishes in the same color for the same project and have to remember to grab the right one because I’m brushing, not spraying. Get it?
So, what is my favorite paint? Sherwin Williams ProClassic (water based) with Floetrol added. It’s so nice.
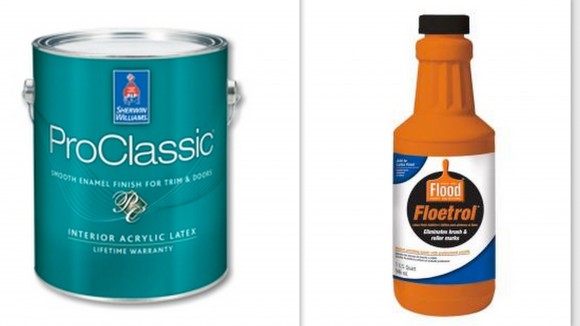
Obviously this is subject to change, but currently–and for the past I don’t know how many years–that’s my go-to combination.
I’ve tried four different paint sprayers before I found the one I now have and love. I didn’t like any of them. I’m not going to say what they were because, frankly, I’m not a scientific testing facility. I don’t put products through the 20 point test with different products under different conditions. I only have my own experience to pull from and my experience might be different from any one else’s. I don’t want to influence anyone NOT to buy something just because it didn’t work for me.
That said, I do have some opinions on paint sprayers in general that might be of use to a person who is in the market for a paint sprayer.
I’ve said it many, many times, but when you’re picking out tools, it’s a very individual process. You need to know what it is you’re buying the paint sprayer for and what’s important to you. Depending on what you want to do with your sprayer, you’ll need to look for different features.
If you want to slap some paint on a fence and don’t care what it looks like up close, probably any ole’ inexpensive unit should do the trick. If you want to PAINT cabinets and furniture with a really nice fine finish, you have to be more selective.
What to consider?
- How often are you going to use your sprayer and how much paint will you run through it?
- How do you plan on using it. In your shop? On site? Is the project standing up or laying down? Vertical or horizontal spraying? Do you need to paint little nooks and crannies? Is a big HVLP gun going to get heavy and cumbersome?
- The gun, nozzle and tips, are probably more important than the unit.
- I would HIGHLY recommend buying your gun from a paint store so you can talk to knowledgeable persons about your specific needs. Tell them what paint you like to use, what you want to paint, how you want it to look, how you want to handle the gun, how much paint you plan on running in a year… They can help YOU find the right sprayer for YOU.
Now, on to the different sprayer options:
HVLP Sprayer
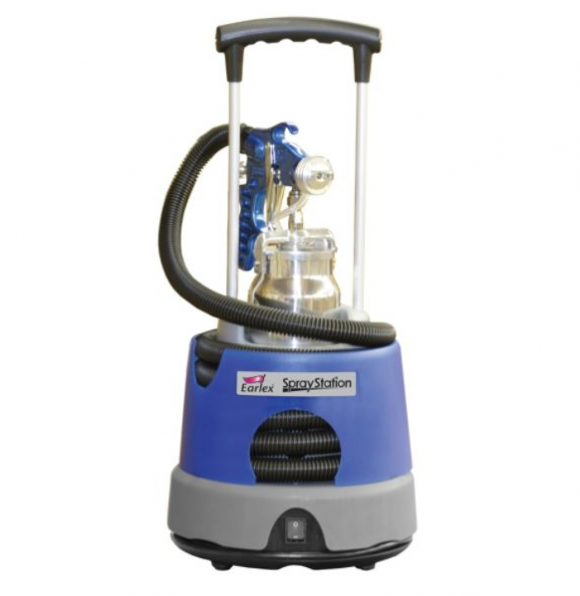
I’ve tried a couple HVLPs, aka High Volume Low Pressure sprayers. One was an expensive unit and then a couple cheap ones. Despite the above picture, I should mention that I do not have an Earlex, but I’ve read good things about it. If you give it a try, let me know.
I found my big money HVLP to be a pain. It was difficult to set up because it had one knob to control the air pressure and another knob to control the paint. When you adjusted one knob, it affected the other, and you had to adjust the other one again. Which then affected the other knob again, and you had to adjust it again. And on and on and on… it could go on forever! I DO NOT recommend getting an HVLP with 2 control knobs.
One of the cheaper ones just gave me a crap finish. The other lower budget one was ok, but would only perform with a very small spray pattern. In my opinion, not worth the money to buy a sprayer just for small jobs and then have to get another one for big jobs. You have to set up and clean it either way. Why waste money on two units? I just want ONE that will do anything and everything I want it to do.
Another downside to HVLP sprayers is that the paint cup is attached to the gun. Sometimes it’s on top of the gun, as in a gravity feed, and sometimes it’s on the bottom.
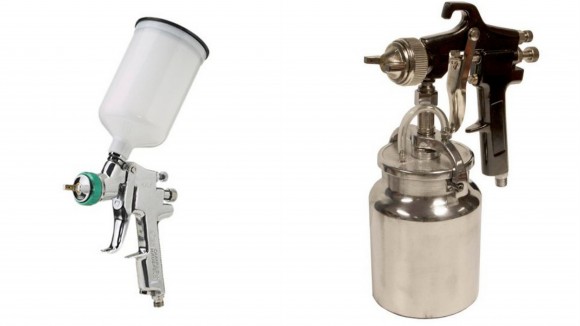
The thing about having the paint cup on the gun is that it gets heavy and cumbersome when painting a large built-in, especially when you have a bunch of cubbies to get into. It’s really hard to manipulate a big, heavy gun, and you have to hold the gun upright only. For some, it works great. For me–not so much. I need more freedom.
Also, you have to refill your paint as many times as it takes to finish your project. It’s a major pain in the butt in my opinion.
On the other hand, the good thing about an HVLP sprayer is that HVLPs are generally known for giving a good fine finish with paint (if you can get the viscosity right). For those who don’t know, viscosity is the thickness of the paint. They are also known for having very little overspray.
I know a few people that have an HVLP with only ONE knob to adjust, and they love theirs. So–if you’re set on getting an HVLP, make sure it’s only got one knob.
Spray Gun with an Air Compressor
Some people are tempted to get an inexpensive gun to use with an air compressor. I tried it, too. The thing is most DIY’ers don’t have an air compressor large enough to run a spray gun. The little compressors we buy to run our nailers and staplers are NOT big enough to successfully run a spray gun. My little pancake compressor ran non-stop and still didn’t have enough “umph” to spray.
Again, this is my experience. If you have found a spray gun that will paint large furniture and run off a 2 gallon compressor, please let me know!
Airless Sprayer
Airless sprayers generally have more overspray than HVLP’s. That is the main downside to airless in general. You will use more paint.
However, the plus sides are you can stick the paint intake hose right into a can of paint, whether a gallon or a 5 gallon. No having to refill a tiny bucket here! NICE! Plus, the gun is smaller, lighter and can get into nooks and crannies and spray in any position: straight up, sideways or upside down…whatever the situation calls for.
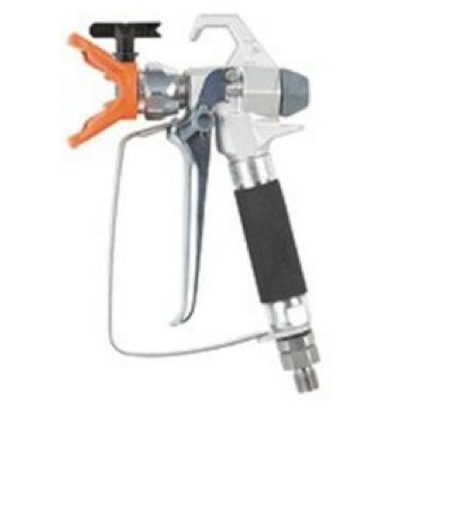
There are more options than this, but you get into a whole new price range, skill requirements, and safety hazards with air assisted, pressure pots, electrostatic…
There are so many more things to consider even in the few sprayers that I covered that it gives me a headache. I do not claim to be an expert! This is all just information I’ve gathered and organized (and that stuck in my brain) out of all my research and trials with sprayers and with all the confusing information out there.
What I Purchased
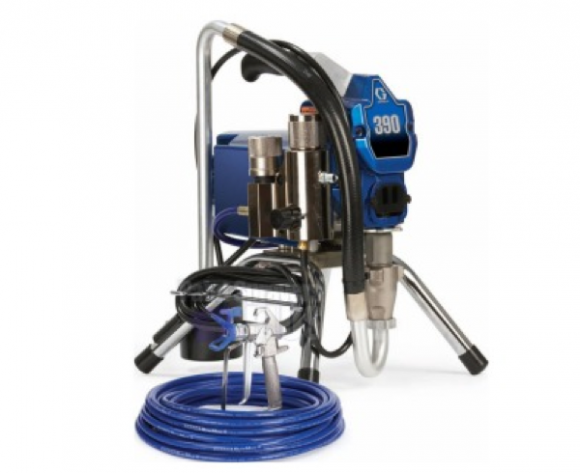
This is the unit I ended up buying. It’s a Graco 390 airless sprayer, and it’s really more of a professional sprayer. It will handle a lot of material, so I don’t have to worry about it breaking down on me after a few gallons of paint. I wanted a sprayer that would last. I don’t ever want to buy another sprayer in my lifetime. I’m serious!

This sprayer cost me $699, even with the fact that I got it on sale from Sherwin Williams. It’s normally $799. Like I said, it’s more of a professional sprayer. I don’t expect that everyone wants to run out and buy a $700 sprayer. Also, the extra tips and nozzles are pricey. I spent a couple hundred more on those. All in all, I spent nearly $1000 on my system. Yikes, right?
Here’s the thing that makes this a good sprayer. The nozzle and tips are interchangeable. I can spray paint at the walls if I want, and then change the nozzle and tips for a SUPER FINE FINISH. That’s the most important aspect of finding a good sprayer in my opinion. The gun! Even if you get a $100 sprayer, if you have a good gun with good tips, you should get a good finish.
Not all guns have interchangeable nozzles and tips, so that’s part of why I felt like it was important to spend a little bit extra for the Graco 390. Even some of Graco’s guns don’t have the interchangeable tip feature, so make sure you know what you’re getting.
Getting the Goodies
If you aren’t looking at getting the Graco 390, this part may not be as helpful to you. Hopefully the previous sections have been able to help guide you through your sprayer decision, but if you are getting the Graco 390, here are the additional items I would recommend you get: the blue nozzle and the green tips. The tips might be Titan brand, but I’m not sure.
The nozzle selection process is a whole other confusing fight! For some reason the company thought it was a good idea to make you choose the fan width you want, and then divide that number by 2, and then look at the first number on the package that looks something like this: 3/12. Which means that I’ll get a 6″ fan width and the opening is 12,000 or some crazy thing like that! The opening determines what material you can spray through it, thick or thin.
I mean, seriously? Could they make it any more difficult? Probably, but I’m sure it could be easier! They need to hire a woman to make it more clear! Just saying!
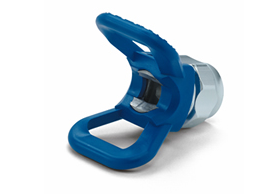
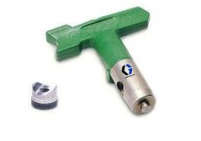
Boom! Oh, and if you were hoping someone had made it more clear, here’s a guide to help with that.
Why I Got the Graco
There are so, so many reasons why I like my Graco 390.
I don’t have to thin my paint. It has one knob to adjust the pressure depending on how thick my material is. Basically, I can spray whatever kind of material I want through it. I can change the nozzle and tips depending on what I want to spray.
When I sprayed my library, I had a few drips that I had to fix but other than that, it gave me a perfect finish. When spraying vertical surfaces, you have to do thin coats, but that’s pretty normal. If spraying cabinet doors, I could lay them horizontally and put on a thicker coat without problems. The sprayer was amazingly easy to use. I put up some cardboard, sprayed and turned the pressure up until the spray pattern was even and the way I wanted it to look. While there’s no manual for that and you just have to practice and go by gut, it wasn’t too bad to figure out.
The gun is small and light, and it can get in the boxes to spray the sides of cabinets and shelves. The one thing I didn’t like is the hose. The hose is stiff and gets in the way. I’m not sure if you can purchase a different hose that is more pliable and will lay down on the floor better, but if you can then the Graco may be perfect. The one that came with my sprayer is so stiff that it curls and bends and flips up and over and hits things that you just painted if you aren’t paying attention and looking out for that. Other than that one complaint, it’s a dream!
All in all, I am super excited about this sprayer. It sprays beautifully and is EASY! That was my #1 request: IT NEEDS TO BE EASY TO USE! It’s going to give me beautiful kitchen cabinets in the spring. I know it was expensive, but I plan on using it for years. Plus, if I’d hired a painter to come in and paint my library, it would have cost me $1000, so it kind of paid itself off. I had to mess with it more than a pro painter would have, and sanding and repainting the drips took me longer, but I’ll get there! Then I will be a pro, too!
So, there you go. More than you wanted to read, I’m sure, but there is no easy answer to “the best paint sprayer to buy–ever”. I wish there were. I wish I could say this unit cost $100 and works awesome, and it’s the one everyone in the universe should buy. That’s what I would have liked to have found when researching, but I had to sift through forums and sites and manuals and videos…until I finally ended up spending way more than I wanted because, frankly, I’m tired of wasting my time on sprayers that crap up my job and make me have to sand and redo!
This is the one I got. It might not be the sprayer for you. However, I hope this long, wordy post helps you wade through your own buying process.
Good luck!
Did you find this tip helpful? You might also like these other Painting Tips!
Also, this is in no way a tutorial for how to USE a paint sprayer. Consult your users manual, use the proper safety gear which includes but is not limited to: eye protection, respirator and ear protection. NEVER point the spray gun at any part of your or anyone else’s body. People have had their hands amputated after hitting their hands with the spray. The pin sized injection can pump paint under your skin and cause serious damage! Be Safe. Be Smart. Be Careful.


I think HVLPs have come a long way in the last 5 years and they are much easier to use and get a nice finish.
I am so happy to have come across your post. I am super analytical and was not looking forward to sifting through all of the data to figure out what I want. I have some furniture pieces I am going to paint and am new to this, but I want to do a good job so I have been doing a lot of research on all of the different aspects. The pieces have edges and detail so I began thinking that spraying may get me the best quality finish.
I appreciate your “amateur” review of the difference between types of sprayers and your experience. I think I may still use an HVLP because I’m nowhere near wanting to make a large financial investment and that may be fine for these projects. None the less your views and input are much appreciated.
I probably should have phrased my minimum amount comment differently.
You can undoubtedly drain the hose to recover the material, but you do need to start with over a quart of material. Basically, with an airless you don’t want to only purchase a quart of material, you want to purchase one to five gallon containers and make sure that they have at least a half-gallon left in them when you start.
There is a difference in waste between different paint systems, but that has to do with transfer efficiency. I don’t think that’s as important for DIYers as other things.
My eyes glazed over reading this. So complicated. This is how I feel as I try to decide on a table saw. Maybe in a few years my brain will be able to process the spray gun decision.i guess I’ll continue to paint with brushes and rollers.