I want to introduce you to another Coaching project I’m working on. My client, Val (Can She Do It) and her husband, wanted a built-in buffet on one wall — but that posed a problem because the proposed wall has a giant intake vent on it. I assured Val that we could hide the vent, retain easy access to it (just in case), and retain the intake function that the vent is supposed to perform.
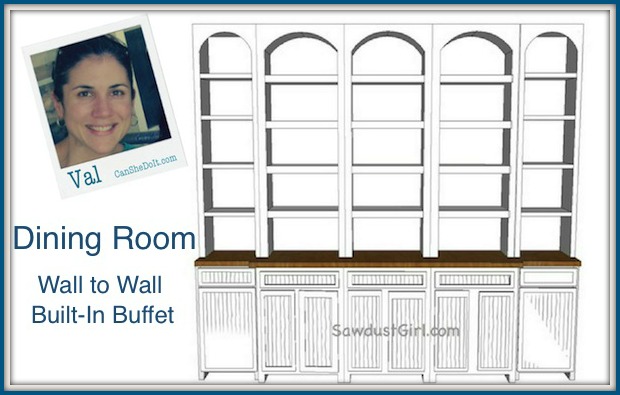
This plan was a winner — which was great because this is actually the third project that Val and I discussed. Sometimes just talking through ideas out loud can help you decide what you really DON’T want to live through and what you really DO want.
I’m happy that we finally arrived at a plan that everyone is on board with and happy about. I gave Val her first assignment last week which she has work on diligently but she ran into a couple speed bumps, which I believe are just as great teaching opportunities as successes. So, here’s the real and raw, “Sawdust Diary” for Val’s first week.
—————————————————————————————————–
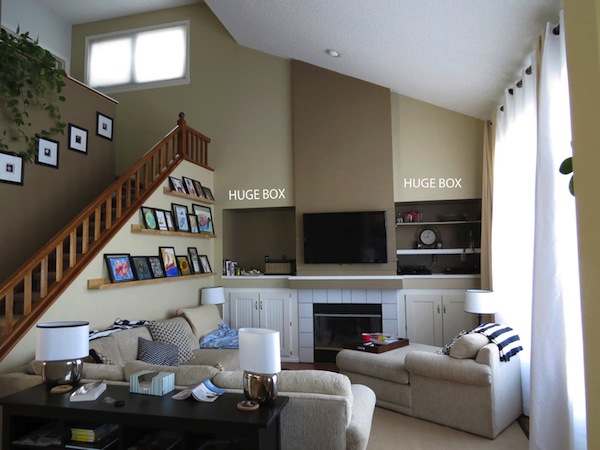
Day one— I met with Sandra via Skype. We chatted about our challenges with the family room fireplace wall. We discussed some options to make it look more like a built in wall unit instead of four big niche style boxes with a flat screen TV mounted over the fireplace in the middle.
My son, an HGTV fanatic, kept walking behind me in various states of construction safety gear. I do not know if she noticed but it was pretty funny. She gave me an assignment to take down the television, remove the ugly plywood behind it and investigate what is behind the drywall via a small hole. I found insulation, which gave her pause when I reported it, but we soon realized it was due to the fact that the fireplace is on an outside wall. Cleared for in-wall television mount as part of the design! She also asked me to make sure that my husband Mike was totally on board for some major demolition work! Mike agreed but then we started discussing a few of the variables involved and wondered if now was really the right time to undertake this project.
Day Two—Worried that Sandra is going to think I am a flake but I really think that a better project for us to start with is to create a built in technology area in the dining room. We have one bedroom on our main floor, one in the basement and three upstairs. We currently use the main floor bedroom as a study and at our old house, we had a built in desk area near the family room. As much time as everyone spends online, I thought it would be a better use of the dining room we never use — to convert it to a study.
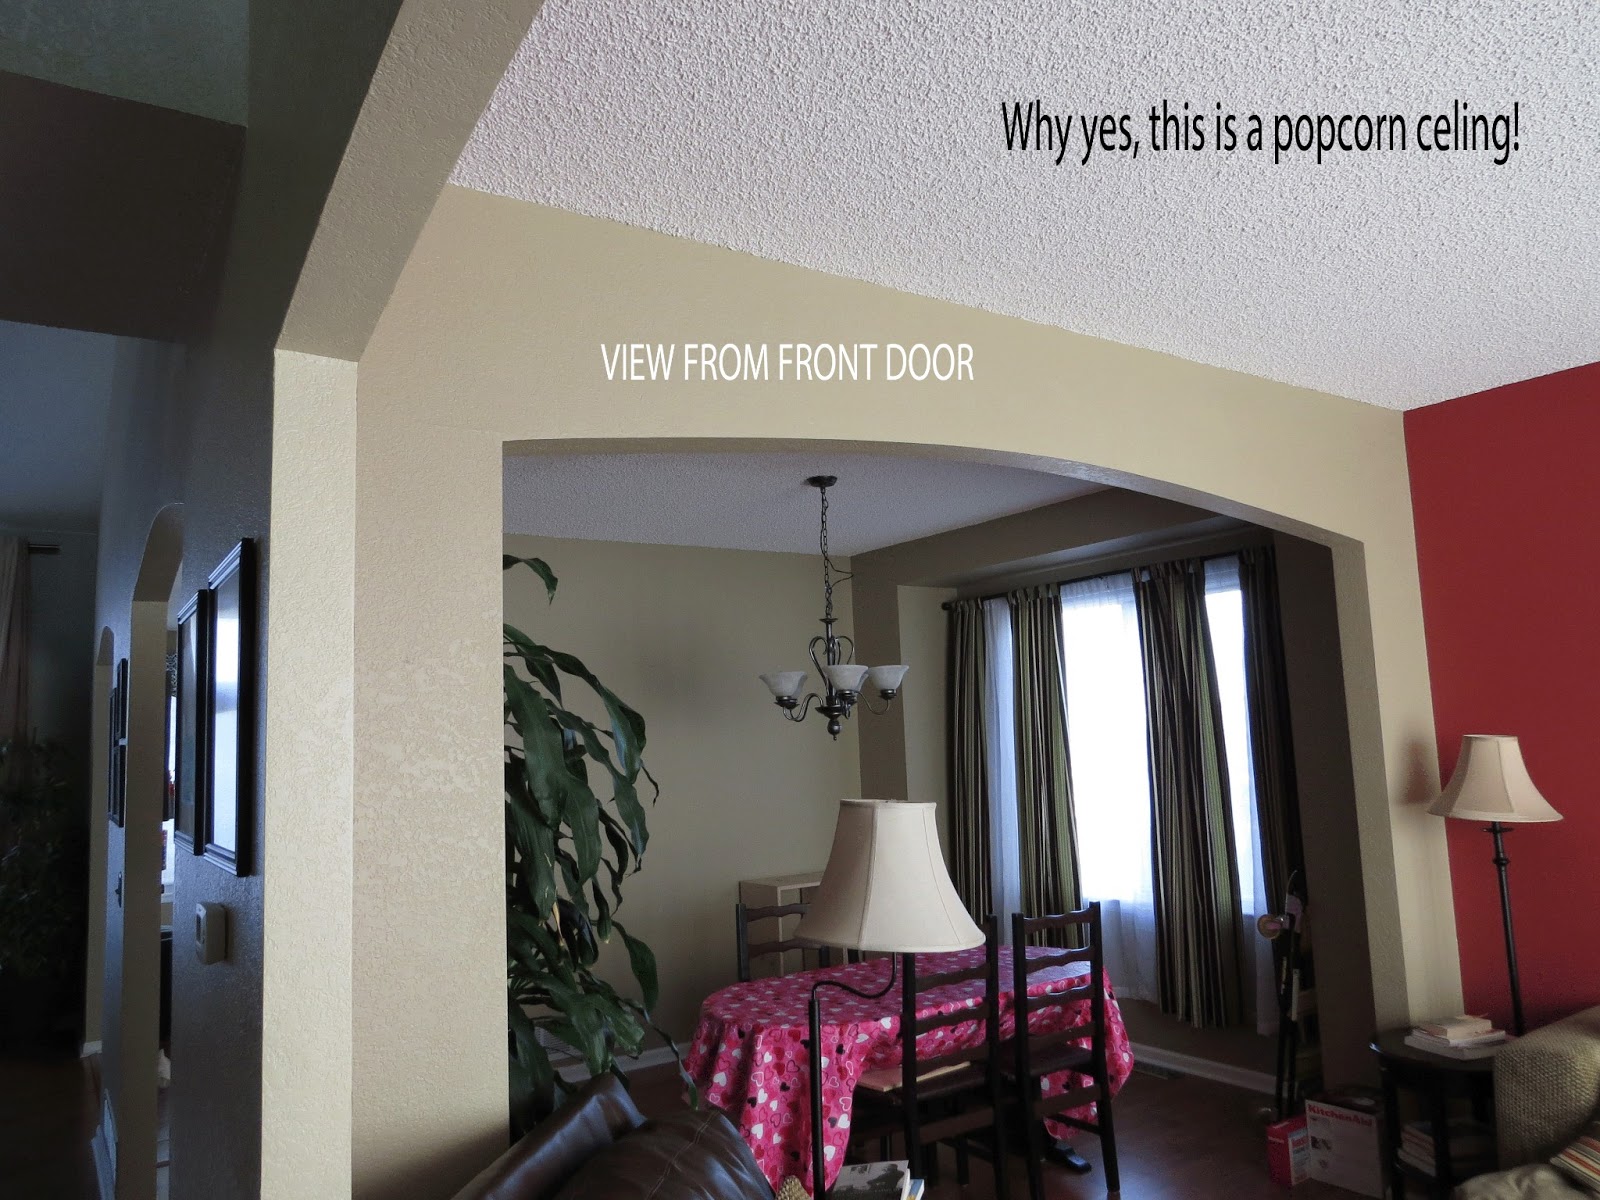
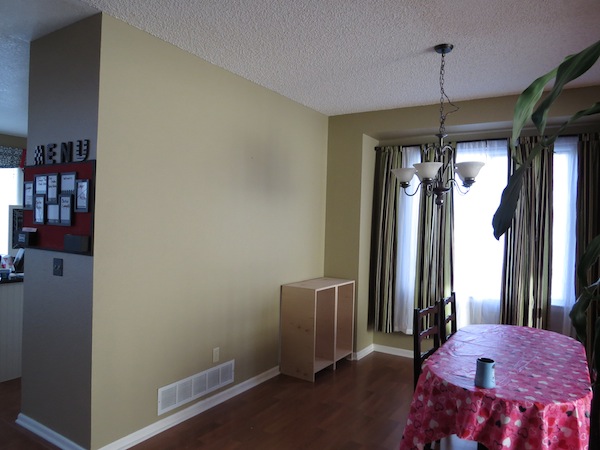
So, without talking to Mike, I launch into the new plans with Sandra. She and I get to working on the plan and I excited tell him all about it. Big lesson here—Do not take on any major projects around the house without first discussing it with your husband. I tell him that part of the reasoning I have is due to an intake vent that is 36” of a 112” wall. My line of thought was we have to leave that open (desk style) and that we just don’t use it as a desk. Long term I think it adds value because people do not really use their formal dining rooms anymore. He is kind of sold but keeps coming back to the point that when you first walk in our front door, you see it and he feels it will look like an office.
Day Three—Sandra and I discuss other possibilities for the wall. We took the intake vent into consideration and came up with the final design! As soon as I saw it, I knew it was the one. I felt that inspired excitement you get when you have a really great idea to create. I showed Mike the latest design and he got excited about it too!
Day Four—Sandra finalized the design and sent me instructions to build the first two cabinets. Her thinking, which I think it brilliant, is build the right and left cabinets and then the middle set—that way we can get a perfect fit since she is relying on exact measurements on my end and is helping build this virtually. I set off to Home Depot to buy supplies and here is another great example of why working with Sawdust Girl is so worth it! I decide that the cabinets should 16”, not 15” so I adjust the cut list and send her an e-mail with the new measurements. Thank goodness for smart phones and a wait at Home Depot. She replies to my e-mail that the cabinet will be 16” once the back and the face frames are attached—DOH! I quickly adjusted the cuts just in time for Gary, the HD Lumber guy to help me. When you are having sheet goods cut, it really helps your cutter if you have your cuts mapped out. I showed Gary my needs and he suggested we cut 34.5 off lengthwise to give me a usable scrap versus just cutting the width to 15”, six times. Some HD employees will just tell you that they do not guarantee accurate cuts and as you watch them cut, you know you are getting bad cuts. Gary was amazing! He took his time and made sure everything was as accurate as possible. Thank you Gary!
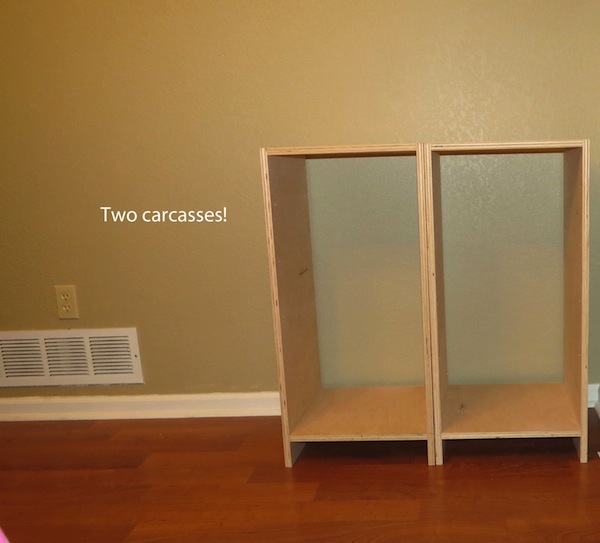
Day Five—I headed home with my supplies and using clamps, I was able to assemble both carcasses quickly.
I used my miter saw to cut down the primed board for the face frames. Did I mention Sandra told me to get Poplar and I decided to buy primed board all on my own? I chose the primed board because it makes the project look a little more “finished” as it is being worked on. So I report back to Sandra about my progress for the day and she asks “What primed board?” I sent her a link, figuring she forgot the “IS” in that question. Now working with Sandra, is working for professional results so she educated me on why that was a bad choice and reiterated that she called for Poplar but told me it was ultimately my choice.
Day Six— I need to make another trip to Home Depot for Poplar and finish the back and the face frames on the cabinets. Then I will get the next phase of my instructions. I cannot wait!
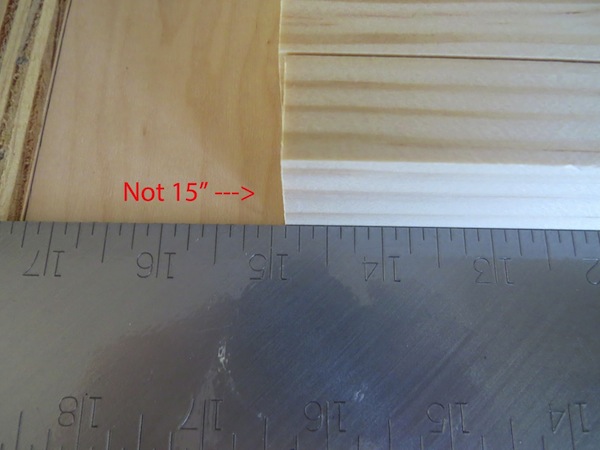
Day Seven—My project is due today and I thought it would be a quick process. To save time, I decided I would just have HD cut the four 34.5” and six 15” boards for me. When I went to get the Poplar wood, it is green and crooked.
I asked a HD guy to help me—Do not assume that everyone at Home Depot knows what they are doing! This guy told me that Select Pine was a great stand in for poplar and much easier to work with since it was cut a lot straighter. So I went with Select Pine and I asked him to make my cuts. Again, do not be afraid to speak up, this is YOUR wood. I watch in horror as he proceeds to mark ALL of the cut measurements on the board at one time. I consider jokingly asking him if he is accounting for the 1/8”kerf but I don’t want to insult him, this IS Home Depot. He checks all of the cuts with his tape measure, several times and I trust that he did it correctly. I get home and this is what I have.
I got ahold of Sandra with a “HELP” message and we talked about how we could make it work with the slightly “short” cuts but when I told her that the HD guy told me about Select Pine versus Poplar…she told me to go back and tell them the cuts are wrong and I was given the wrong wood because Select Pine is NOT a good sub for Poplar. Come to find out, Pine is much softer. She told me to push my fingernail into a piece of Pine and then try it with Poplar. Pine is so soft it will scratch, ding and dent with no effort. Poplar is harder and will hold screws better (I am installing doors on my face frame) and not get dinged up as easily. She also told me that Poplar has a green coloration to it and that is normal but it paints beautifully without a need for grain filling.
Lessons learned:
- Do not be afraid to change the design if you are not in love with it. It is your design, you have to live with it and more importantly you have to build it! If you are not excited when you see the design plans, you will not be excited when you see the end product.
- Make sure that anyone who would be considered a “deciding party” is involved with everything that they should be involved with.
- Follow directions and if you have any questions about those directions, ask!
- Do not assume someone is an expert and knows more than you — just because they work at Home Depot.
- Do not be afraid to speak up about something, if the guy HAD been taking the 1/8” kerf into consideration, he probably would have chuckled and if he had not, it would have been a great opportunity to help this guy not tick off someone who may not be as nice as I would have been about it. I also would not have ended up with six 14 7/8″ select pine scraps!
- Take your own tape measure with you! I wrote VAL on mine to alleviate my personal paranoia about being mistaken for a shoplifter.
- The difference between an amateur and a pro? I believe it’s that they know what to do when everything is NOT perfect as instructions always assume they are. I am so happy to have Sandra to help with the “work around” when things are not perfect!
- If at first you don’t succeed, try, try… try again…off to repeat day six, again.
—————————————————————————————————–
Val is such a good sport to work with. Bumps and all, she’s never dropped her positive, make it work attitude. That’s one thing everyone who wants to build and construct needs to recognize early on. Things aren’t always perfect and you have to figure out ways to work around imperfection without losing your temper or “losing IT”. Walls are often not square or plumb. Sometimes your lumber is cut incorrectly. Sometimes it’s worth it to go have it re cut but sometimes it’s worth it to just figure out how to work with the imperfection. (Like you don’t want to haul 2 tons of lumber back down the stairs, through the labyrinth of construction mess in your house and load it back up to go return it.
It depends on the situation. You have to decide — but realize that sometimes, a little imperfection is OK!
If you’re interested in some DIY Coaching and sharing your Sawdust story on SawdustGirl.com, email me ([email protected]) to discuss your project.

Sandra says
Here’s to new power tools. Yeah! 😀
Sandra says
Simonandra Says! LOL
Feral Turtle says
Looks like an amazing project! Can hardly wait to see the reveal! Cheers.
Sandra says
Sorry, they got accidentally deleted (and I didn’t do it LOL) but they are back up. 🙂
kristin says
All I am thinking as the story goes on is “Sandra says” instead of “Simon says”. Sounds like Sandra knows her stuff! (As if we doubted that–that’s why we follow her blog!) I really don’t have a problem with questioning the guys. You have to be a ball buster (my husband says I’m good at this) but throw in a little sugar and it works. There is always the real jerk but you can try. This looks like it will be beautiful and I love the beadboard. Great work Val–keep it up!
Judy Clark says
Sounds like an exciting project. Will be anxious to see it finished. I think you definitely need to know exactly what you want when you go into those places.
Judy
Linda S. in NE says
The same thing is happening on my monitor. Only one pic to view on this all so important picture post, so that we all know what you are talkiing about and can follow along. Any ideas how to fix?
Beany says
Same here, only seeing one pic.
Rachel says
Same here.
Val Fitzpatrick says
Thank you and I totally agree, Sandra ROCKS!
Jean says
I’m only seeing one picture. The others aren’t coming up.
carolina says
This look really interesting!!! I want more.
Anne @ Unique Gifter says
Looks like a great project! That’s awesome that you were able to make such a large amount of progress in only a week. Doing things takes me FOREVER and I grow to hate them entirely, haha. On a positive note, I had to remove a chunk of baseboard due to my tolerances being too tight. This meant that I got to buy a new power tool, because no one I knew had one to lend me. 😀 New power tools are fun.
jb @BuildingMoxie says
looks like a real nice start of things despite the hiccup. you’re in good hands with Coach SdG. and all the best moving forward Val.