
Whether your TV is hung over the fireplace, on a wall or it is sitting on a table or console, how to hide the cords is always the big dilemma. Angie over at Angie in the Thick of it is here to share her idea and solution of hiding her TV cords in the trim work around her fireplace. It’s ingenious. Here’s Angie.
How to Hide TV Cords in Trim Work
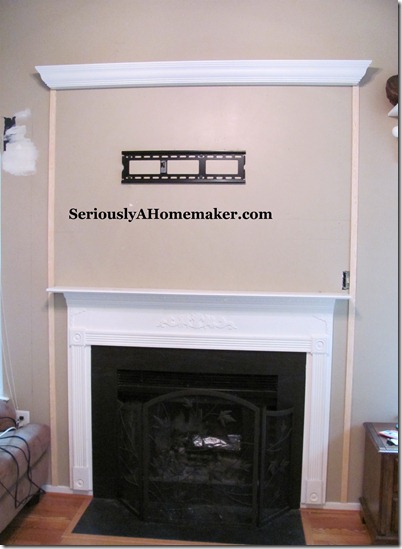
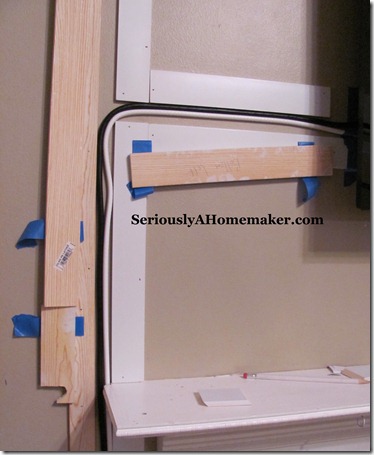
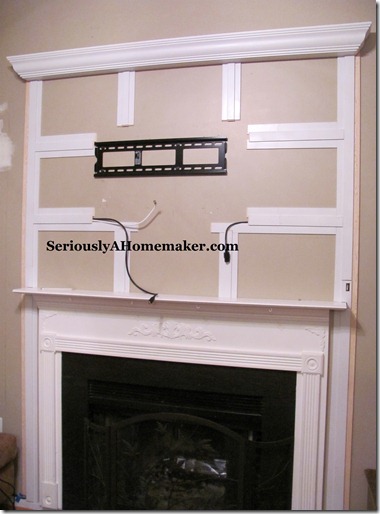
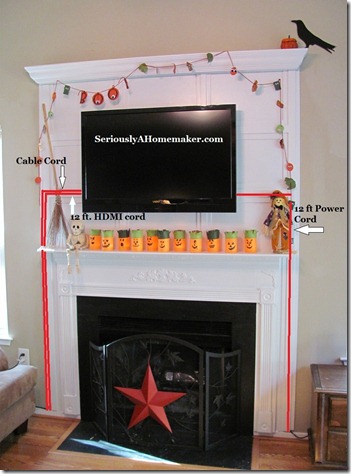
TRIMWORK WITH CHANNELS FOR THE CORDS TO RUN THROUGH! I nailed the trim to the wall with skinny brad nails. No caulk, so that the cover pieces can be popped off and re-installed if I want to add or replace a cord in there at a later date (change electronics or cable providers much?!).
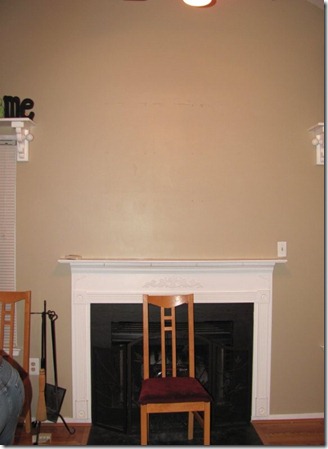
Before the TV Arrived:
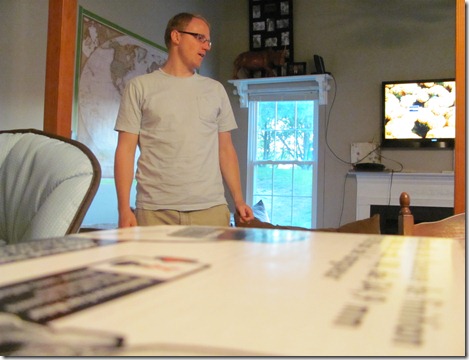
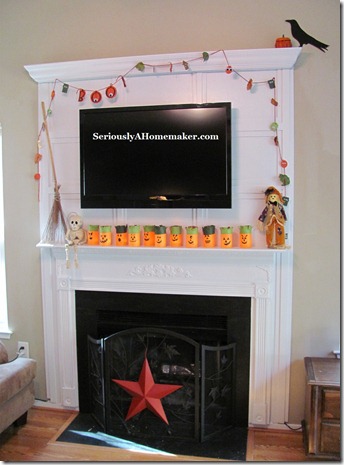
After we put up the TV:
~nervous twitch~
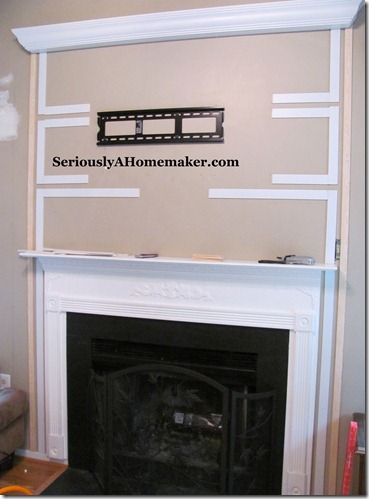
Step 1: Plan it Out
Step 2: Create Vertical Channels
These lattice pieces should and could be primed before mounting them on the wall.
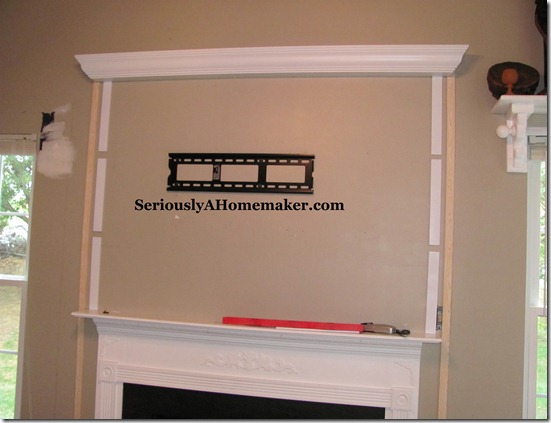
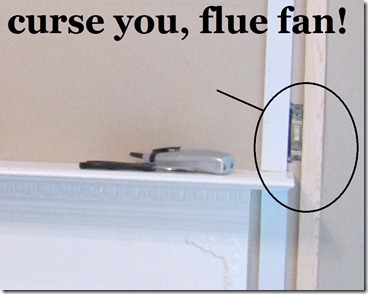
Step 3: Create Horizontal Channels
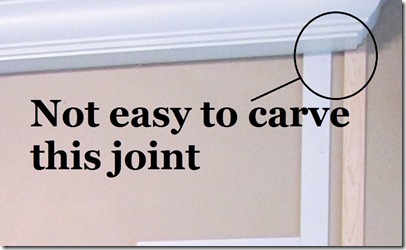
Your project will have it’s own quirks. Enjoy them and the extra hours they add.
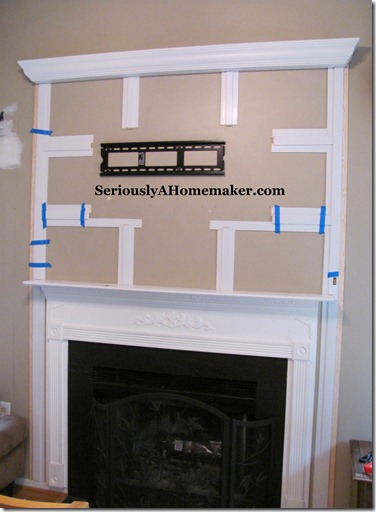
Step 4: Add Additional Channels for Balance & Interest
I nailed the channel pieces and non-functioning cover pieces down to the wall, but only taped the cover pieces that I would be hiding cords under.
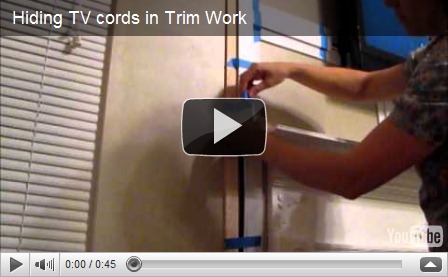
Step 5: Re-mount the TV and Place the Cords into Channels
A video was the best way to show the next part:
Step 6: Take down TV and Paint it All Up!
Tell me you love it?
Stop by my house sometime at Angie in the Thick of It and let’s have some {un}serious fun! You can find me on Facebook, Twitter, and Pinterest as well. When I am not wielding a nail gun (DIY) I am chasing my 4 kids and trying to convince my husband to take us out to eat.
Thanks, Sandra, for letting me guest post today! {smooches}

Dianne says
Looks great…wish I would have read this before we did all the wall cutting and climbing thru the attic that we did..
Pattie says
You are the "WOMAN"!!!! How great. Thanks for sharing! 8>)
Stacy says
How creative!!! It looks beautiful 🙂
Katie says
Oooo. I definetly might be trying this one!
Andrea says
Hmmmm…now my mind is spinning with (new) ideas about what to do with all MY cords. What an awesome idea!
pinktoesandpowertools says
That is seriously awesome!!! What a great idea! I love to read how other people solve problems like that.
Angie @ SeriouslyAHomemaker says
you guys are rocking my world today. i heart you all!
Colleen the Laminate Floors Queen says
Hi Angie,This is really awesome. Not only does it look great but as Andrea points out, it's blowing my mind with ideas on how I can clean up my TV space. So very creative – thanks so much for sharing.Colleen
AntiqueChase says
Awesome!! Thanks for this tip…very useful!
Miriam says
I love this project Angie! It turned out beautifully!
Heather Loveless says
This is brilliant. Really, I think you have convinced me to get a nail gun so I don't have to see those god awful ugly things. Thanks!
The Pennington Point says
Absolute genius. I am all over this idea…I have cords EVERYWHERE!! Lisa~
Jen says
Hey there, I nominated you for a Stylish Blogger Award! Go to this link to see what's up =).http://classycosmetics.blogspot.com/2011/02/stylish-blogger-award.html
Angie @ SeriouslyAHomemaker says
I've told Sandra this on twitter, but maybe it needs to be said here for all to read: Sawdust and Paper Scraps readers are the most kind, generous, and encouraging readers I've ever come across! Your encouragement has been incredible and much appreciated! You guys are giving me so much confidence, yet at the same time I don't feel pressure to be a full-time DIY-er (cause I can't be!). It's just fun to know ya'll! Thanks for the love!
CuddlyBunny says
Holy cow! What a great idea!Plus, I love the nail gun sound effects!
Ann says
What an ingenious idea! This is something you should share with HGTV!
You’re right, there is nothing in cyberspace like your idea so I’m going to share it with the folks over on GardenWeb! Many Thanks!
angie @ seriouslyahomemaker says
I am slow getting back to you ann, but wanted to say thanks for chatting me up at GardenWeb! It’s quite a compliment to be good enough to pass on to others!
Camille Warning says
Where are you hiding your components? I’m struggling with where to put mine where they will look best. A picture would be awesome! Thanks!
angie @ seriouslyahomemaker says
Camille, I just actually am using a little night stand right now on the left side of the fireplace. On the top of the night stand is the PS3 (and a little tiny cable box), in the drawer are all the controllers and remotes (IDEALLY- YEAH RIGHT!), and in the space under the drawer I have 2 big zip up CD/DVD cases where we keep the DVDs. The cords are all stuffed into the back of the drawer and behind the dvd cases so that I see as little of them as possible, ya know what i’m sayin’?? good luck with your system! email me if you create this too!
Janis @ Home Style says
Brilliant idea!!!! I’m Pinning this pronto!
angie @ seriouslyahomemaker says
Janis, A pin is my best friend! Thanks!
Megan R. Bean says
I think this idea is great but I can’t figure out how you made the channels to where you can open them up again. Did you just paint the painter’s tape white?
Heather @ House of Woyaks says
I just wanted to say thanks for this amazing tutorial! We will be doing this project for our living room 🙂 YAY!
I shared your photo here: http://houseofwoyaks.blogspot.com/2012/01/living-room-adventures-just-got-so-much.html
Valerie says
What Megan asked, how did you attach the channels that need to be able to be opened up? Did you nail them, but just not caulk and will pry them open if need be, or do something else?
Thanks in advance for the info, this looks great!
Sandra says
Hi Valerie. This is a guest post from Angie over at Seriously A Homemaker. If you could pop over and ask her on her blog, I’m sure she will be happy to explain in further detail. She’s awesome like that!
Parents of a Dozen says
This looks great! What a great idea. I am looking for a solution for my cords, but I have a brick wall to deal with.
http://www.parentsofadozen.com/2012/01/family-room-and-kitchen-updates.html
brenda seaman says
wow! amazing. i have been looking for an inexpensive way to jazz up the empty space above my mantle. we have tv up (no cords!). but we have a blank 20 ft wall above it. i like that just need to figure out where to stop it w/o going up20 ft. and having it look nice and complete. thanks for inspiring me.
Adrienne says
Hello. I love this tutorial and this idea. I wanted to post a link to your website on my blog. I’ve never done this before, so it seemed fitting to ask your permission first. I plan to mention you under my TV Wall posting.
Let me know if this is fine with you.
Thanks,
Adrienne
Arlie says
That is a great idea, but where did you hid the boxes that are in the before picture? They are really an eyesore for me as much as the cords.
Abby says
I just found this link on Pinterest, and I wanted to let you this is an AWESOME idea! We’ve been looking for a way to hide our cords, as my hubby insisted on hanging our TV above the mantle. I can’t wait to try this. Thanks for sharing!
Arleen says
Absolutely beautiful, creative idea!
Marylou says
Can’t wait to share this FANTASTIC project… Thank you for all the photos and detailed instructions… That makes this job so much easier… 🙂
Kathy says
It bothers me that so many people are putting their flatscreens above their fireplaces (It’s a TV, not a piece of art) but having said that, your idea is brilliant. You go, Girl!
Mike Jackson says
So, yes I am a “man child” myself as you gracefully labeled your other half. The differences are, I have an Xbox as opposed to a play station. But needless to say, I have the same irritating uncontrollable nervous twitch you do when it comes to cords. We are moving in to a new home (new to us), and “the wife” (me being nice) wants the TV mounted on the inside (obviously), of an exterior wall, which means I can’t run cords on the inside of the wall, (damn her). Your idea is fantastic!!! So let’s see if this idea of yours can be passed by the “committee” of 1!!! Thanks for showing it!
Allison says
We are trying to mount our flat screen above our (gas) fireplace… the only problem is that my hubs said that we can’t mount it to the wall because it’s the flue. It’s a plaster wall, and he says there aren’t studs to attach the mount to. Any suggestions out there??? And there really is no where else in the room to have our t.v. so we have to figure something out.
rick says
there should be studs that the drywall is mounted to.
you can go to any hardware store and get a “studfinder” for only a few dollars and use that to find yoru studs, then … away you go! 🙂
Adrienne says
I love what you have done here. I meant to mention you as an inspiration photo when I attempted to hide my cords too…but I couldn’t find you again. I like yours much better, but our mantle is so bulky and huge, when you put the tv above it, you just end up with a sore neck! I still have a few cords about an inche away from the outlet…hmmm….maybe I could put a plant there!
Great job!
Steph says
AMAZING!! Found you through Pinterest and this will be a LIFESAVER! We’re buying a new home and the only place we can mount the tv is over the fireplace and I have been fretting about the cords and where they’ll go! This is PERFECT!
Janey says
So, did you nail the covering trim over the cords? Do you have to pry the whole thing off when you have to move or add cords, and then nail it all back on again and cover the nails?
Marti says
I love this solution to an annoying problem. I checked Angie’s blog to find out more, but there is nothing there. Do you know if she moved it?
frogmama says
So forgive me, I know you said you taped them, but how exactly does the top wood cover the cord channels? Is it double stick tape or something?
Very nice job – especially with the addition of the two-tone paint and upper trim over the windows. thanks
Angie says
Hey how on Earth did you get your PS3 cords to reach ALL THE WAY up that wall to the TV??? I don’t understand. haha
Katy says
Looks amazing where are your cable boxes? We want to try to do something like this , we have our flat screen mounted but cords hanging an Wouk like I hide the cable boxes ideas?rhanks!
rick says
all you need is your cable box near the wall plate that brings the cable into the room. Then, hop on Amazon or a site like it and purchase an HDMI cable that will reach your location. If you are insterested in controlling your cable box while it’s out of site, you can get an “IR KIT”, they are simple and easy to install.
Good Luck
Amy says
We purchased the Datacomm 45-0031-WH Recessed Low Voltage Media Plate with Duplex Receptacle, White to hide our wires in the wall. It is another effect and clean look for your tv room. I really like the look above the mantle and will be using it in my tv room. Thanks!
Shayla says
Thank Thank you for this post! The ugly cords were hurting my head soooo much and this project has made everything better. It is definitely the best cord finding idea on the internet.
doug says
Why not just move the light switch for the fan? Or at least extend it out so you can put a plate on it rather than violate code like this.
Dan says
Very clever! It’s a bit more intricate than I thought before reading the steps.
To make this simpler, you could just build fascia boards in three horizontal sections the same shape as all of the trim. Have all of it two inches or so from the wall, finish with the same crown molding, etc. This way, you’ll have lots of flexibility moving cords around, and leave fewer issues for the next tenant.
dave says
not to be fanning the flame, (no pun intended) but please make sure your readers know that you are (or should be) running fire rated/behind the wall cords behind fixed structures and/or walls.
if you don’t they could be setting themselves up for code violations, and quite possibly be setting yourself up for major liability if your homeowners insurance doesn’t cover faulty workmanship.
Sandra says
The cords are not in the wall or behind a permanently fixed structure. The trim can easily be popped off.
Tarran says
Where did you move the PS3 to?
Matt says
“Dang switch. It REALLY complicated my whole project. It is the switch for my fireplace flue fan. Not sure why we need a fan, but I guess it’s a nice feature.”
Bite your tongue! 🙂 I wish I had a flu fan. Instead, when I want to start a fire I stick a hairdryer up the flu to get it warmed up. That flu fan sucks the warm air from inside your house up the flu, so you don’t get smoke filling your room when you start a fire. Don’t speak ill of that fan! 🙂
JOhan says
What a genius idea! My wife and I are trying to create a French style in our living room and somehow make it all look slick with the 65 inch tv. This is simple such a cheap and great idea. Well done all the way from sunny Cape Town