I share a lot of plans that involve building cabinet doors and don’t want to have to draw out this detail every single time so here’s a detailed tutorial showing you How to Build Cabinet Doors by cutting a dado into your door material that will accept a 1/4″ panel. You can use any 1/4″ material you want for the panel. I often use beadboard or MDF.
How to Build Cabinet Doors
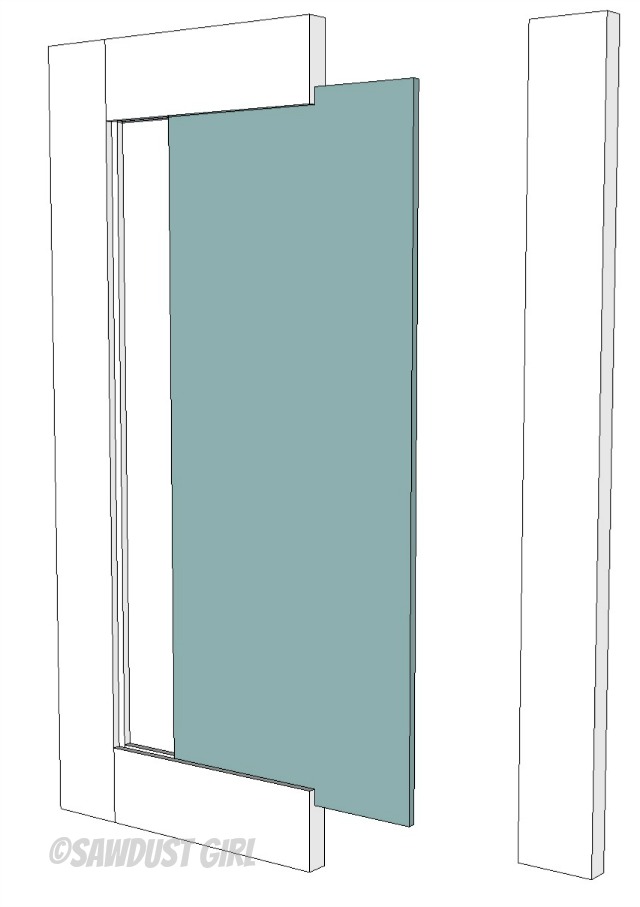
-If you cut your dado 1/2″ deep it’s easy to figure out the math for your doors, just add 1″ to the width and length of the panel. 1/2″ of the panel will slide into the dado on all sides.
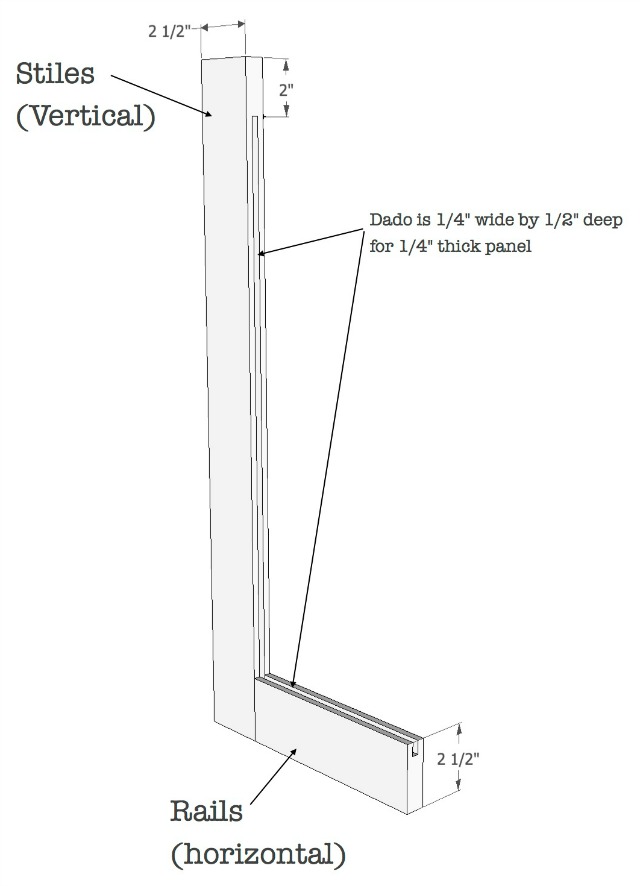
- Mark the back of each board so your dado lines up when you assemble your doors.
- Total cut depth will be 1/2″. If using a table saw you can make it in one pass with a 1/4″ dado blade. If using a router, you’ll need to make it in several passes.
- Start and stop the dado cuts 2″ from the end of each board so you won’t see them from the door edges. This is easiest to perform safely on a router table but can be accomplished on a table saw. I put down some painters tape to mark where to start and end my cut. Be exceedingly deliberate and careful when making these cuts!
- Secure three sides of the door. You can attach both stiles to one rail or both rails to one stile (as I did in this picture).
- There are lots of different options for joining the door parts: loose tenons, biscuits, dowels or pocket hole screws if you don’t mind the extra work of plugging them. I have the Beadlock Pro system – see this tutorial for that.
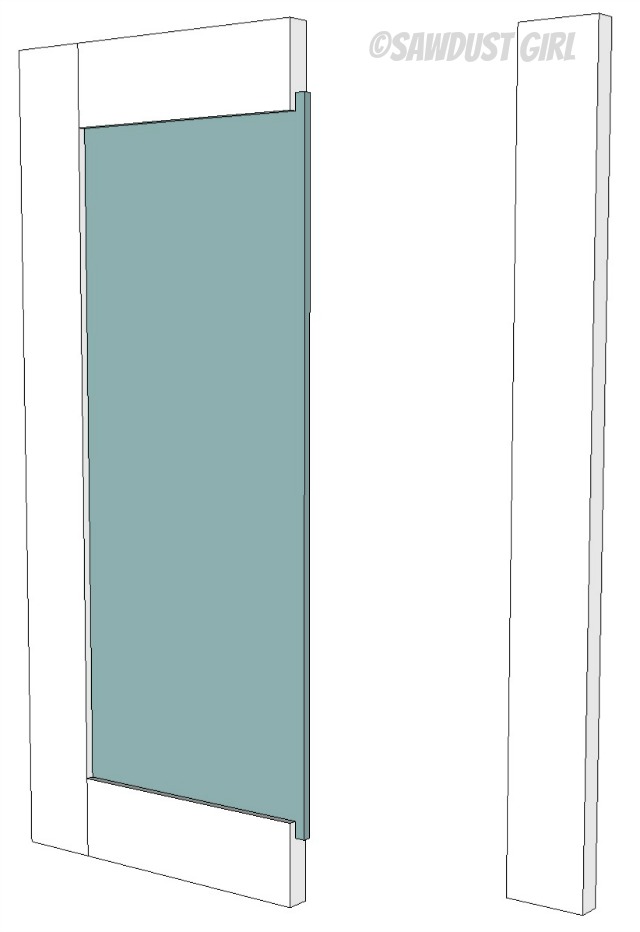
- Slide the panel in and dry fit the last piece.

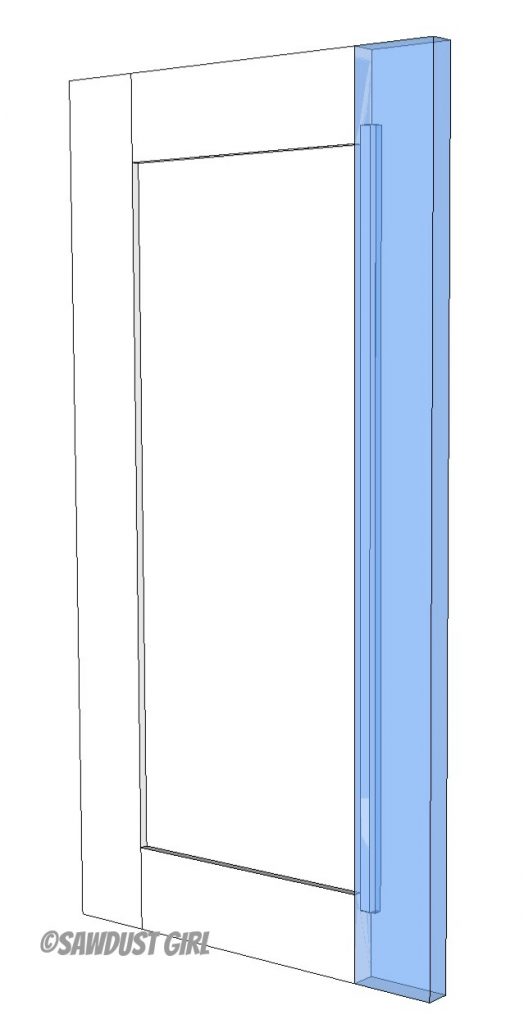
- Attach the last door piece and you’re done.
Doors can be tricky. Sometimes they twist and don’t lay flat when attached to the cabinet. Wood has a mind of it’s own and there’s always the possibility of it warping, expanding, contracting, splitting… There’s not much you can do if the wood you purchased decides to have a dance party but here are a few things you can control.
- Assemble doors on a flat surface
- Don’t apply too much clamping pressure. Apply just enough pressure make sure both sides are making contact. Do not make the wood bow–that’s a sure sign of too much pressure.
Once you build, sand and finish your door, you just need to select your hinges and install everything and that’s a whole party of it’s own! Good luck, be safe and be awesome!
You might also like:
- This tutorial on building drawer fronts. Built similarly to building cabinet doors but the panel is inserted into rabbets so the panel is flush with the drawer.
Get my Cabinet Building 101 eBook. All the information in one place that you can download and keep on hand!
$9.99Add to cart


Mary Ruth says
We have recently made doors using this method. It sure is rewarding after they are finished! We just finished painting and sealing them, and installed. Each step is time consuming and takes a lot of work, but sure beats the prices of purchasing them! We made our stiles and rails a bit wider to give the door a heftier look (bulkier door). We also did the flat panel in the center (not raised panel) to be more of a Shaker door. WE did so a routing on the inside of the stiles and rails and only a small round over on the outside edge to soften the overall look of the door.
Good review you posted here, and will check to see how your doors came out after finishing.
Tina Gleisner says
Love your illustrations that really show how the pieces of the puzzle (door) fit together, as the concepts aren’t easy to understand the first time.
Kristi @ Creative Kristi says
How would you start 2″ in from the edge if you were using a table saw?
Eryn says
My existing cabinets have a flat panel. I want to change them to a raised panel… but I do not want to purchase new doors for all my cabinets. Can I use this tutorial to change my panel? How would you go about removing a stile or rail without damaging it? Also, do you know of a company that sells unfinished raised panels?
Dennis says
Always make your panel 1/16th” smaller than actual size, to allow for seasonal movement. Or else your doors could be pushed apart. Not a big problem with MDF, but always a good rule to follow.
dc says
Cool. Wish I had a tablesaw or router.
Bobbi says
II think making a drop dado cut on a table saw sounds VERY unsafe and if you’re using a router bit you shouldn’t remove a 1/2″ material in one pass. It scares me to think inexperienced woodworkers will try these procedures. Maybe you could do a video showing these techniques done safely.
Courtney says
I clamped the heck out of my doors. Maybe THAT’S what warped them! Never thought about it.
Kim Massa says
Thank you Sandra. It’s nice to have this tutorial to reference any time I need it.