• Home
  • About
    • Personal Posts
  • Privacy
  • Shop
    • My Account
    • Checkout
    • Email
    • Facebook
    • Instagram
    • Pinterest
    • Twitter
    • YouTube
Sawdust Girl®

Sawdust Girl®

Renovation, cabinet building and woodworking plans and tutorials. Build like a Girl®

  • My Home
    • Clinton TN House
      • Clinton TN House in Progress
    • Maryville TN House
      • Maryville TN House Tour – Completed Rooms
      • Maryville TN House in Progress
        • Basement
        • Basement Storage Closet
        • Bedroom Office
        • Craft Room
        • Dining Room
        • Entry
        • Garage
        • Guest Bedroom
        • Hallway
        • Jack and Jill Bathroom
        • Kitchen
        • Kitchen Entry
        • Laundry Room
        • Library
        • Living Room
        • Loft
        • Madison’s Room
        • Master Bedroom
        • Master Closet
        • Pantry
        • Porch
        • Powder Room
        • Wes’ Office
    • Illinois House
    • Calderwood Cottage
  • My Workshop
    • Clinton Workshop
  • Build & Breakfast
  • Cabinet Making 101
    • Cabinets
    • Doors
    • Drawers
  • Projects and Plans
    • Countertops
    • Beds
    • Benches
    • Bookshelves
    • Desks
    • Gift Ideas
    • Holiday
      • Christmas
      • Halloween
    • Home Accessories
    • Kids
    • Kitchen Cabinets
    • Lockers
    • Nightstands
    • Organization accessories
    • Recipes
    • Sewing
    • Tables
    • Vanities
    • Wardrobes
    • Woodworking
      • Wood Finishing
    • Workshop
    • Workshop Storage and Organization
  • Remodeling 101
    • Baseboard and Trim
    • crown molding
    • Demolition
    • Door and Window Casings
    • Door Installation
    • Drywall
    • Electrical work
    • Flooring
    • Home Maintenance
    • Painting
    • Plumbing
    • Resources
    • Safety
    • Tile
    • Wall and Ceiling Treatments
  • Sawdust Squad
  • The Sawdust Diaries
    • Andrea
    • Ava D.
    • Beckie F.
    • Cara C.
    • Courtney B
    • Fawn T.
    • Jenn D.
    • Kelly C.
    • Kristy K.
    • Lara T.
    • Malisa B.
    • Marnie D.
    • Robin C.
    • Val F.
  • Tools
    • Products
    • Tool Reviews & Overviews
    • Inspiration & Ideas

Pantry Floating Shelves

All Posts, Floating Shelves, Pantry, Projects and Plans

I’m another step closer to finishing this new, new, new pantry!  Some days I feel like I knock out a ton of work and other days it feels like I’m making snail progress.  I just keep plugging away and eventually something get’s finished and then I celebrate — like today with the Pantry Floating Shelves!
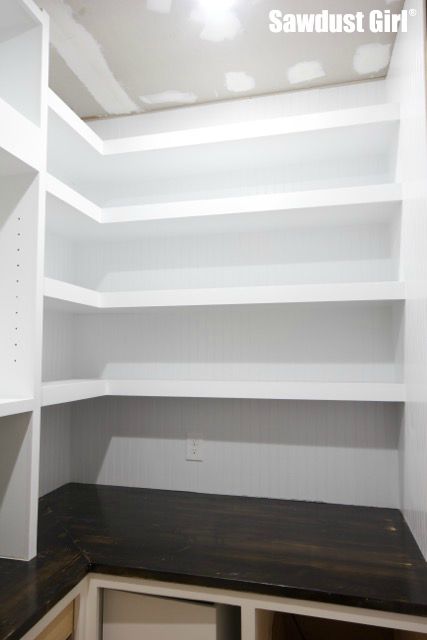
Corner Floating Shelves in Pantry

Video Part 1

Video Part 2

Floating Shelves

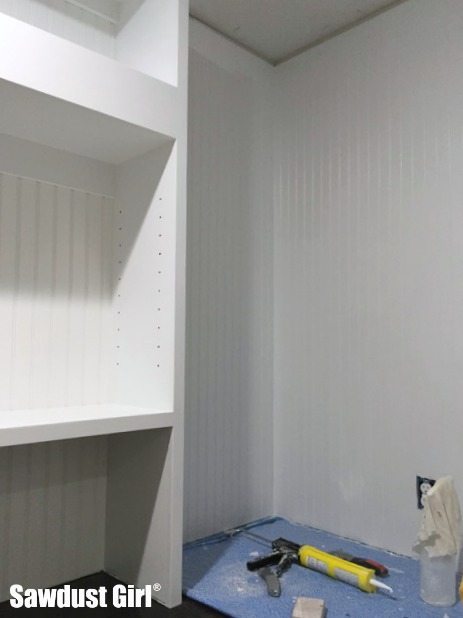
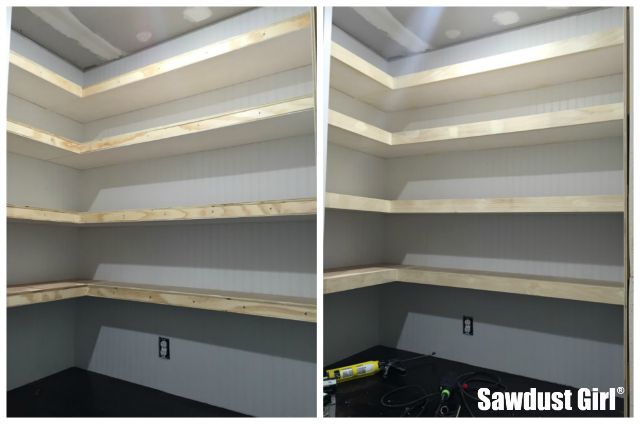
After installing the bank of cabinets on the long wall, I applied beadboard to the exposed walls.  I did make sure to mark the location of my studs on both the ceiling and countertop (on painters’ tape) before covering the walls.

Floating shelves for the Pantry

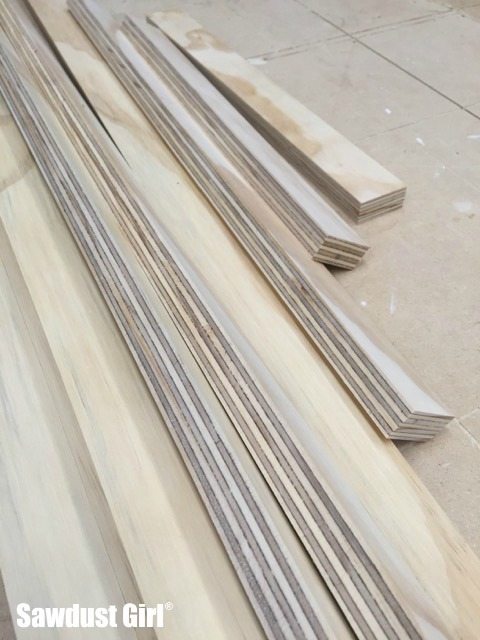
I’m using 3/4″ plywood for the ribs of these shelves, unlike many of the floating shelves I’ve done before.  Like this, this, this, this or this…

These shelves won’t hold anything too heavy so I’m confident they will be sturdy enough for what I need.

Floating shelves for the Pantry

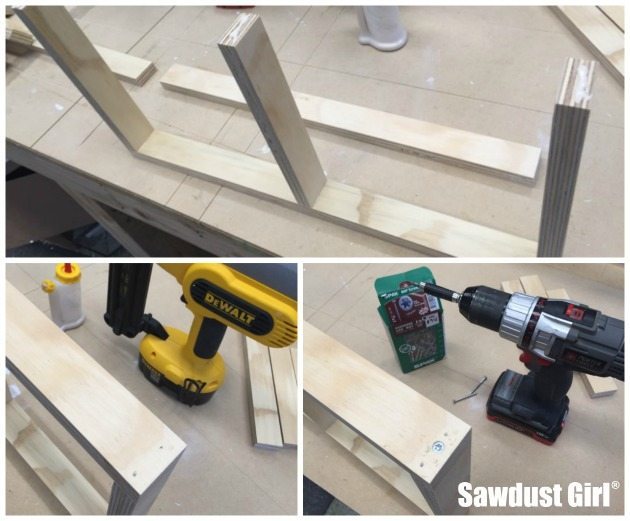
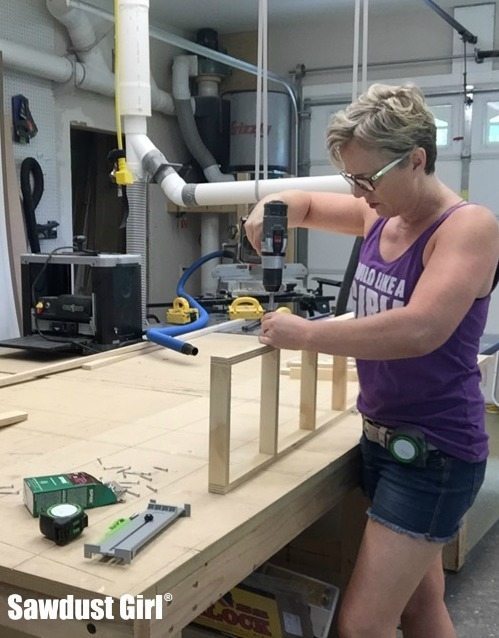
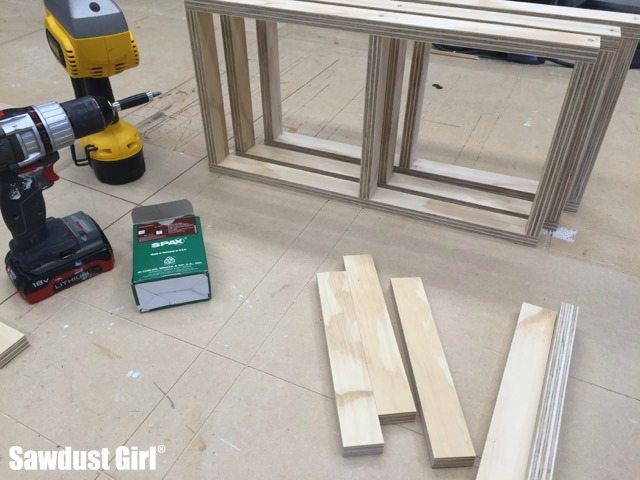
I used wood glue and 1 3/4″ SPAX wood screws to build the “ribs”.

Floating shelves for the Pantry

Floating shelves for the Pantry

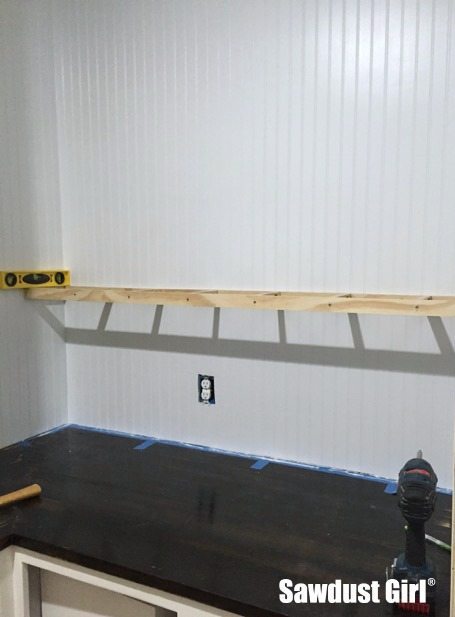
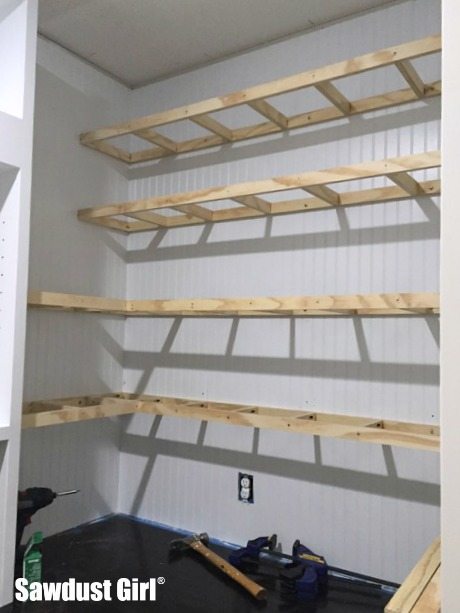
To install, I used 3″ cabinet screws and secured the ribs to the studs in the long wall and side walls.

Floating shelves for the Pantry

The first shelf is only 8″ deep while the rest are 12″.

Floating shelves for the Pantry

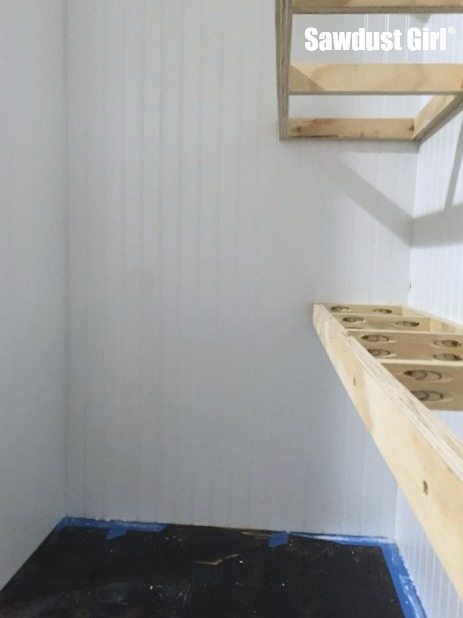
I installed all the long shelves and then measured and build the short shelves for the adjacent wall.

Floating shelves for the Pantry

I got this far on the corners before having to go back into my shop to fix a mistake.  LOL  It happens!Floating shelves for the Pantry

After finishing the ribs, it was just a matter of covering them up with plywood and a face.  I used 1/2″ plywood on the tops and 1/4″ on the bottom.  The faces are 1×3 poplar.  I installed them flush on the top with a small overhang on the underside.  I used wood glue and nails to secure the plywood to the ribs.

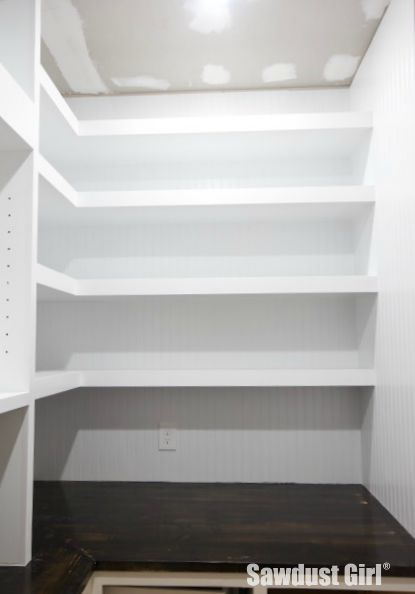
Corner Floating Shelves in Pantry

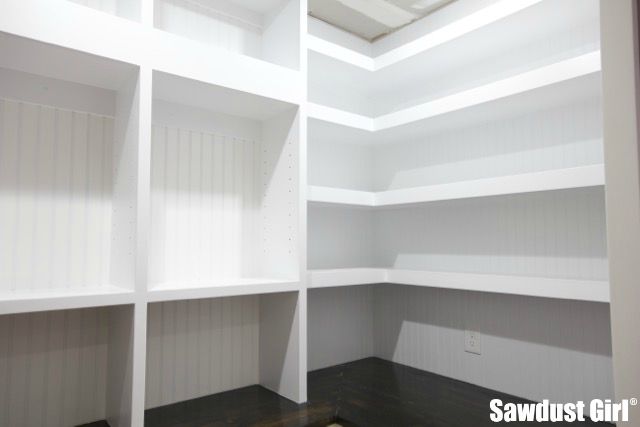
Of course I filled,sanded, primed, sanded, filled some more, sanded again, caulked, vacuumed and wiped…really well and them painted.  And they turned out awesome!

Corner Floating Shelves in Pantry

Corner Floating Shelves in Pantry

Now on to the next 23 items on the pantry to-do list.  heheehheheheee  ’till next time!

July 15, 2015 · 7 Comments

« How to Build and Install Pantry Cabinets – Part 2
Three Tier Shelf »

Comments

  1. Renee says

    July 15, 2015 at 2:32 pm

    Hey Sandra,

    What’s the difference in strength from using 3/4in ply for the skeleton of these shelves vs. your 2x2s in your closet? I was a little surprised that you suggest its not as sturdy as the 2xs

    (I’m doing kitchen shelves w/ 2x2s where a bunch of pretty Le Creuset cast iron will be displayed, so I’d love for them not to fall off my wall)

    Thanks!

    Reply
    • Sandra says

      July 16, 2015 at 12:55 pm

      Well a 2×2 is double the thickness of a 3/4″ plywood. I think if I were planning on storing heavy items on these shelves, I would have doubled the plywood strips. Working with the plywood was easier than working with 2×2 because it’s so hard to find straight 2×2’s. Now that the plywood top is glued onto all the spines of each shelf, the entire shelf feels really chunky and solid. So it might be fine for a heavier load. I think I would still at least double up the back brace which I drove 3″ cabinet screws into the studs to support the whole thing.

      Reply
      • Dirk says

        January 23, 2023 at 4:38 pm

        I feel you pain on the straight 2×2 but You need to ask for “finger joint 2×2”. Those will be straight and solid!

        Reply
  2. Melissa says

    July 15, 2015 at 3:33 pm

    Great post and love the videos (especially the end with the crud in the hair…happens to me too, without fail!)

    Reply
    • Sandra says

      July 16, 2015 at 12:56 pm

      Never fails…though this was one of the worst “blobs” ever! LOL

      Reply
  3. Guerrina says

    July 15, 2015 at 3:37 pm

    Love!

    Reply
  4. Kimberly says

    July 16, 2015 at 2:12 pm

    I’m so happy I found your website! You are one talented gal! The pantry is to die for, can’t wait to see it all finished :-)) Oh and I love the videos, so helpful.

    Reply

Leave a Reply Cancel reply

Your email address will not be published. Required fields are marked *

Categories

New Post email notification signup

You Subscribed!

Legal Stuff

Terms of Use

Privacy Policy

Disclosure

Recent Posts

  • March 2023 Lodge Update- Moved in
  • January 2023 Lodge Update
  • Lodge Update – Floors, Cabinets, Countertops, and Appliances
  • Lodge Kitchen Cabinet Progress
  • Halloween Mad Gab – Halloween Party Ideas

Disclaimer:

Although it is my intention to provide accurate plans and clear instructions, not all plans have been tried and tested. Using plans or information found on SawdustGirl.com indicates that you agree with the Terms of Use policy and will accept full responsibility for the process and outcome of any project you attempt. All plans are for private use only. Plans and information published on SawdustGirl.com may not be reproduced, republished or distributed in any manner without written permission from Sandra Powell, Sawdust Girl. Actual projects built using Sawdust Girl plans may be published on your own site without instructions or "tutorial" as long as you provide a link to my original post with full post title or "SawdustGirl.com" as link title.

Copyright © 2023 · anchored theme by <a target="_blank"