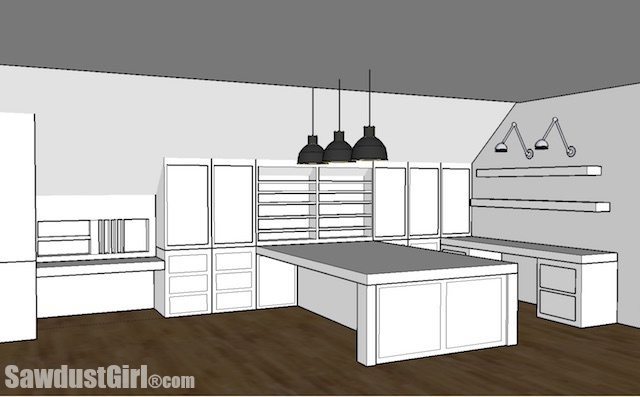
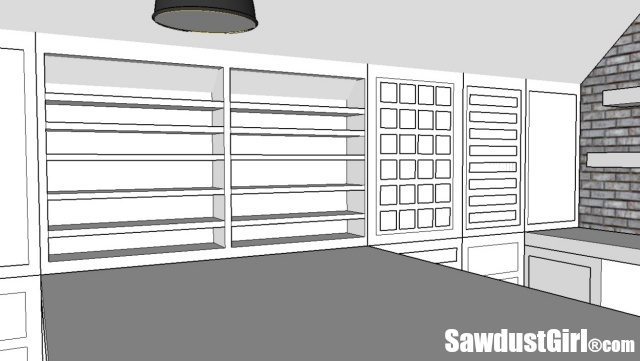
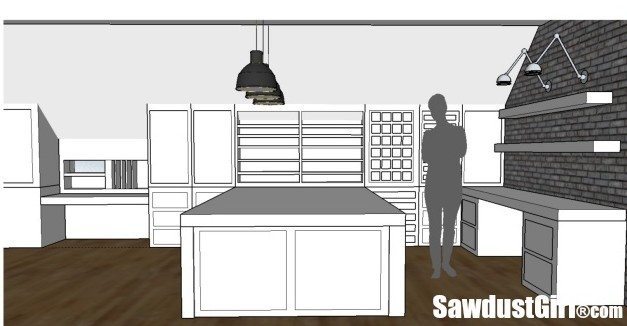
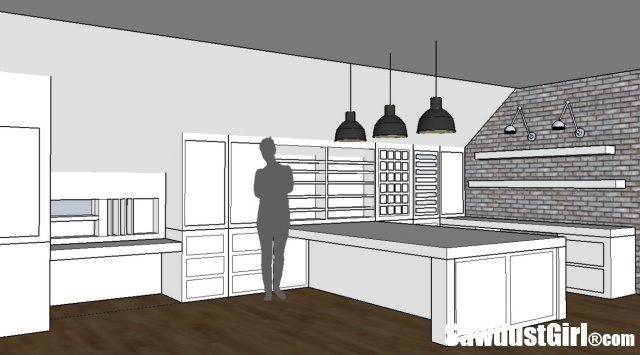
This is the craft room design plan I decided to go with! Thank you guys so much for all your input on my design options post. It was so awesome to read every single comment– all 78 of them! A good majority of you liked option 4 — but a lot of you had some suggestions for slight changes. I did decide leave out 2 cabinets on the feature wall to create a desk there. I’m not able to do whatever I want in this room because because of the dang slanted ceiling!
Ceiling details
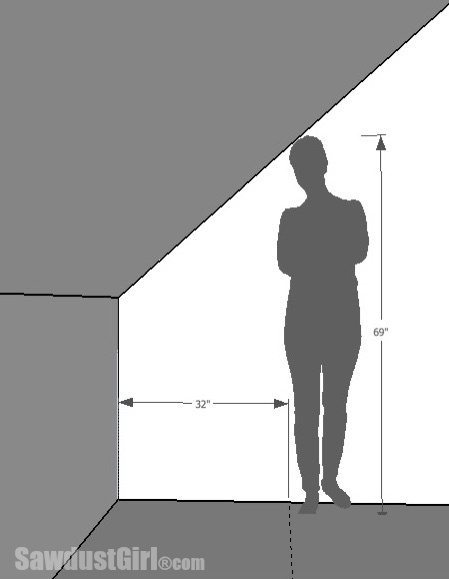
In the loft, the ceiling slants down to 38″ where it meets the side walls. I want to utilize as much space as I can but no matter what configuration I choose, I have to loose some floor space on the sides of the room where the ceilings are the lowest. I have to pull my cabinets forward to a minimum of 32″ from the side wall to make sure I won’t be smacking my head on the ceiling in my finished craft room.
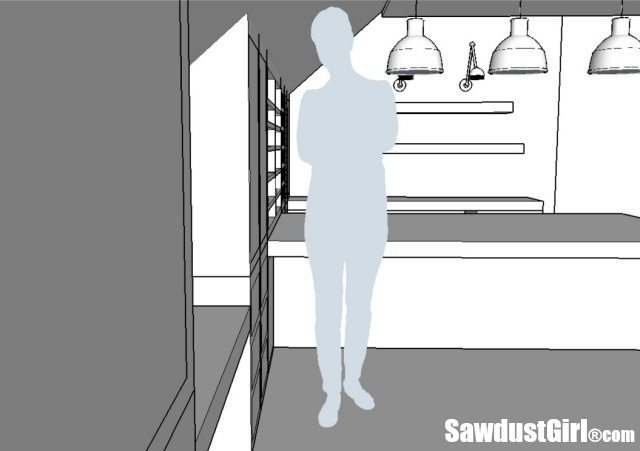
The island will be standing height. If I put standing height countertops flanking the island, if I leaned forward to reach for something I would smack my head on the ceiling unless I pull the cabinets out to about 44″ away from the side wall. I feel that would create too much dead space behind the cabinets.
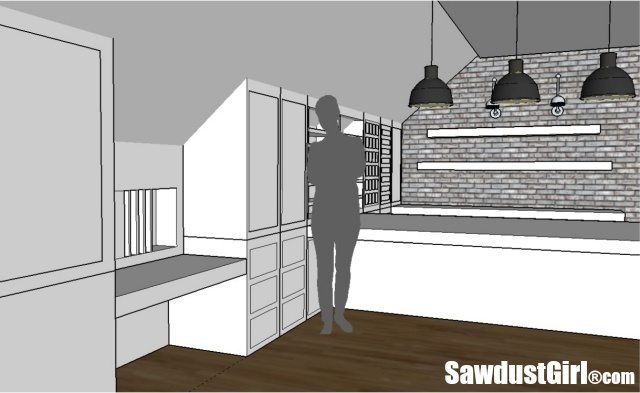
The desk on the side wall will work because it would be sitting height so a person’s head will be farther away from the ceiling while sitting in that station. I like the desk scooted over away from the island so one person could be sitting at the desk and another person could utilize the island at the same time.
Countertop Heights
The upper cabinets will be very shallow at the top because of the ceiling. I may simply have doors on the cabinets with shelves inside or I may do some creative organized drawers. I’ll decide that later.
Cabinet Details
So my decision is to go with Craft Room Option 4 with one alteration. The feature wall will have knee space in the center so I can use it as a desk if I choose to — instead of all cabinets under the countertop.
I thought it would be helpful for me to explain the why’s behind my decisions for those of you that are planning craft rooms or trying to utilize a loft space with a slanted ceiling. I spent a lot of time trying to find the balance between getting heigh enough ceilings to feel comfortable in this space while keeping as much floorspace as possible so I can have my island as large as possible. It’s big at about 5′ wide by 8′ long. I think I should be able to have several projects going on at once or invite 6-8 people over for a crafting party (or some kind of class) if I ever decide to do that.
Also, on a wall you can not see, I have another large island and three additional seating stations as well. So I think I’ll have plenty of room to do all I want to do. I’m pretty dang excited!

Tom says
This is a great post! I’ve always wondered about building in this sort of space. Question though: why not just build the cabinets really deep rather than pushing them out with a wall? Would it not be an efficient use of space (how deep of a cabinet could you really have without stuff getting lost?), or is it more of an issue with using a sheet of plywood efficiently?
Sandra says
The base cabinets could be deeper. I’m not going to build them deeper than the standard 24″ because drawer slides get more expensive the longer they are and I don’t need the extra depth in the drawers.
G says
Have you considered building backless cabinets for the base cabinets and using drawers that go back as far as possible, even perhaps beyond the wall that is now there into the gabled space. The bottom drawers at floor level could be on wheels that would handle the weight of very long drawers. As the drawers go higher they would also get shorter so would have less weight and would function on slides. Also, the shelves above the craft table appear to be rather shallow leaving space behind them. They could possibly be put on a hinge so that they could swing out and cover an additional set of shelves behind them to take advantage of that unused space. I like the overall design and the functionality of the space and storage. I always look to using all available space as I have never had a place large enough that I felt that I could afford to lose and space.
Sandra says
It would certainly be possible to make the drawers as deep as I want. How I have it, I’m losing 9″ behind the cabinets and I’m ok with that. It’s not worth the added expense to create deeper drawers and I don’t need that storage space. My main goal is to have the island be as long as possible while not hitting my head on the ceiling.
Kathleen kludt says
Love the design…I’m envious. One question…if you leave the upper cabinets deep, could you have tall, narrow pull outs that pull into the desk area? They would be behind a false back on the upper cabinets, but give you storage for things like aerosol cans, tools, etc
Sandra says
I’ll be getting full use of the upper cabinet space. The doors or drawers will open forward though not sideways into the desk area. They will just be shallow on the top and get deeper as they go down.
Tracy says
Looks great. Thanks for explaining your reasons behind the changes you made.
Melissa from Hey,Girlfriend.Net says
I love your plan! I am happy you are adding the additional desk space under the end wall, I think you will use it even more than the other desk shown. I can’t wait to see the next step!
Felix says
The island layout has giving me the idea of what I want to do in my workshop. The island as it is designed here would surround my cabinet saw so that I have a layout platform to the side and use the other side as an out-feed platform for long rips of sheet goods.
Dave Cearley says
I think the full height cabinets will help keep the room from looking cave like.
Could you share why you’re not adding a dormer window above the second desk?
Also, what software do you use to create your wonderful mock ups that look hand drawn?
Thanks for letting us tag along on your craft room journey.
Laura Chapman says
I love reading all your plans for your house! What design software do you use to do your room plans?
Sharon Davis says
Love this design. It’s helped me tremendously decide on a design for my craft room which is also an attic room. You’ve shown ideas I had not thought of. This is awesome!
Thanks,
Sharon
Cyndie Schneider says
Love it! What is the total size of this space?